Tuesday, October 15, 2013

Junkers Unite With a "Book Runner", A Pin Board, AND a Link Party!

Happy day Junkers!  Do I have something extra fun for you today!  A group of fellow junking bloggers and I have teamed up to bring you a plethora of fabulous, new junking projects, plus more!
For those of you who are new here, welcome!  I am Becky, author of Beyond The Picket Fence.  I love to take discarded items, thrift store finds, and reclaimed wood and transform them into "needful" home decor items for the "country chic" home.  You can see many of my projects here on my blog and can also follow along via Facebook and Pinterest.

Grab your favorite warm beverage, settle in, and enjoy some lovely, junky, doable projects!

This past summer my sweet hubby built me this terrific table from reclaimed wood doors.  And while I love it, lets face it, all that wood screams a little too much testosterone for my taste.  
Thus my need for some color on that wood was born.  And the perfect way to do this without painting it was to add a table runner.  But a typical fabric runner wouldn't work for me, so I created one out of old books (bibliophiles, look away!).
I love books, and old books are the best.  Their warm, musty smell, fantastic fabric covers in great colors, and yellowed pages make me giddy.  I buy most of my old books at thrift stores on half price sale days.  I look for fabric covers (A bonus is these covers are fairly washable.), in colors that appeal to me, and also for the titles and subjects.  For example, I used a trigonometry book because hubby was a HS math teacher, 
an English Lit. book because I taught English, 
and the Underwater Treasure book for its turquoise color.  Think of the different runners you could make--use all children's books if you have younger kids, Christmas books for the holidays, all vintage cookbooks-- the possibilities are endless.
Gently tear the book pages, all together at once from the cover.  You can use an exacto knife along the inside binding if it is too tough to tear out.  SAVE the torn out book to read or use for future projects.
I then laid out the books in the pattern I wanted, turning a couple the other way for interest.  I wanted some of the the runner to hang over the edge of the table--I had to switch a few books out to get the right length for the overhang.  Measure the width of the smallest book cover in your runner and cut a piece of felt that width and the length of your runner.  I used a dark red felt because that was what I had and actually used two pieces to achieve the length I needed.
Hot glue the book covers to the felt.  
It helps if you glue the binding first, pushing it flat, and then glue the rest of the book.  Hint, use a hair dryer on cool to get rid of hot glue "cobwebs". 
I decided to add a little burlap ruffle to the ends. 
 I love this burlap ribbon from the craft store because the edges are finished.  
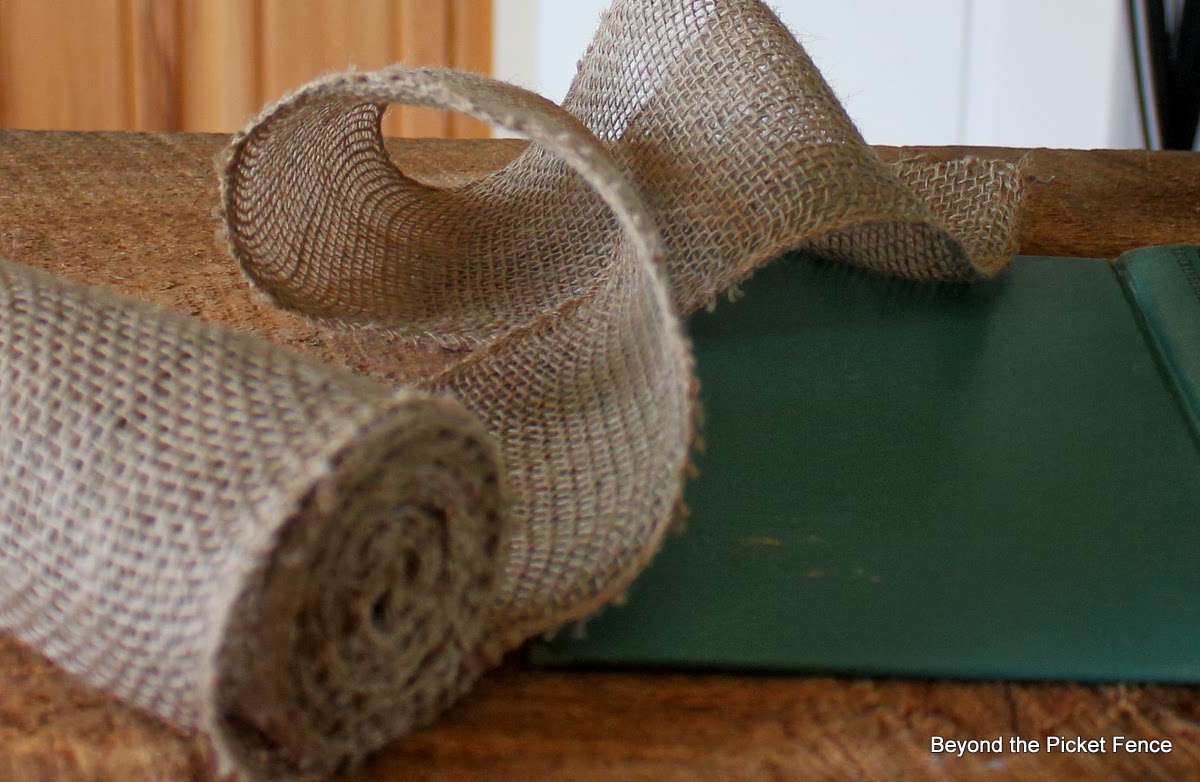
Hot glue the burlap on the end books, ruffling it as you go.
Simple and unique--not your typical runner.
Oh, and those book insides?  Stack them in the middle of your runner, 
add a few candles and some rusty junk to make a one of a kind centerpiece!
Pick up a few good books and start creating!  I linked up at KNICK OF TIME.

We junkers have been on pinning frenzy--pinning the best junk out there.  Check out our Junkers United board HERE.

And see all these lovely ladies?  Each one has created a new, junky project and tutorial for you to enjoy. So hurry up and get clicking on the links below!


But wait, that is not all (Do I sound like an infomercial?).  We want to see your junk so link up your own fabulous creations below and we will pin our favorites to the 


Monday, October 14, 2013

Ladder Shelf

Ladder shelves have been around for awhile, but I have never made one until a few weeks ago.
ladder, reclaimed wood, shelf, Beyond The Picket Fence, http://bec4-beyondthepicketfence.blogspot.com/2013/10/ladder-shelf.html
I had a half of a tall ladder, I had used the other half or side for something a few years back.  I screwed barnwood pieces to the rungs, screwing them in from the underside of the rungs.
repurposed, ladder, shelf, Beyond The Picket Fence, http://bec4-beyondthepicketfence.blogspot.com/2013/10/ladder-shelf.html
I added some D rings to the top part of the ladder so it can be secured to a wall.
ladder shelf, wax, old ladder, wood, reclaimed, repurposed, Beyond The Picket Fence, http://bec4-beyondthepicketfence.blogspot.com/2013/10/ladder-shelf.html
I decided to leave it in its natural wood state--which doesn't happen often.  It went to a new home this past weekend.
salvaged, decor, shelf, ladder, barn wood, Beyond The Picket Fence, http://bec4-beyondthepicketfence.blogspot.com/2013/10/ladder-shelf.html

Friday, October 11, 2013

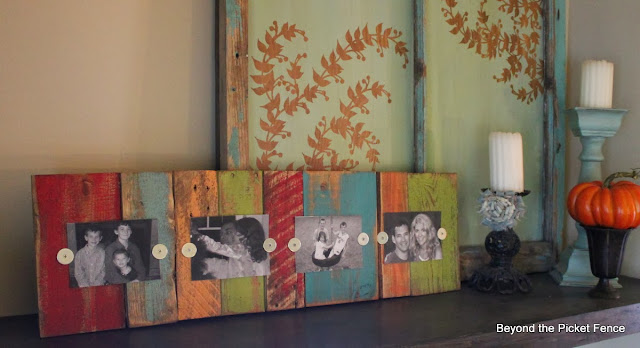
Colorful, Scrap Wood Photo Display

pallets, scraps, frame, photo holder, paint, http://goo.gl/mHMD53I used a long board across the back to connect the pieces,


Using some of my leftover scrap wood pieces from other projects, I ,made this "frame".
scraps, pallet wood, frame, photo holder, http://goo.gl/mHMD53
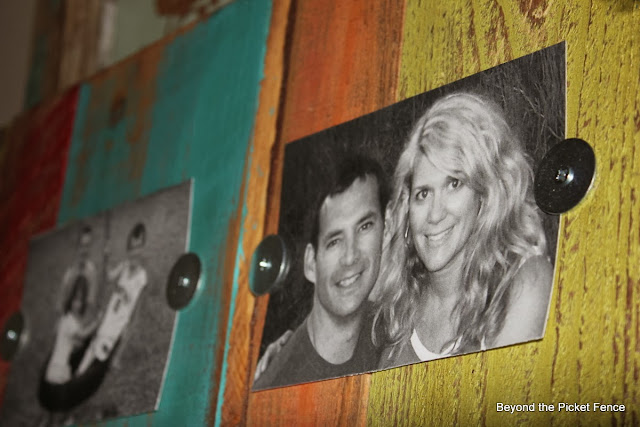
and big washers set 6 inches apart to hold the pictures.
pallets, scraps, salvaged, colorful paint, photo display, http://goo.gl/mHMD53
This can hang either way, horizontally or vertically 
photo display, pallet wood, scraps, colorful paint, http://goo.gl/mHMD53
and is made for 4x6 pictures, but I think would hold 5x7's as well.
photo display, pallet wood, salvaged, scraps, frame, http://goo.gl/mHMD53
Can't wait to play around with this idea and build other shapes and sizes.
pallets, scrap wood, photo display, colorful paint, frame, DIY, http://goo.gl/mHMD53

Thursday, October 10, 2013

Island, Shmisland

Yes, I know, I am the island queen!  I am not really sure why other than they always sell and are so much fun to make. (Sorry ahead of time for the yellow flash pictures)

I do not think I have ever made two exactly alike, which is part of the appeal also for this abstract, random, not assembly line kind of a girl.

So this one started with a wonderful drawer that was already in a "casing" or had sides and slides so it opens and shuts.  It did not have a top at all.
I added 2x6's for legs, 
a beautiful reclaimed wood top that is polished up with coconut oil,
and a shelf on the bottom for storage and stability (See some of my canned applesauce down there--I made 20 quarts--so yummy!).
I bought this great $2 rusty piece for a towel holder, 
it slides in and out--spray it well so the rust doesn't come off on towels.  Does anyone know what it might have been?  It had a great place on it with holes so it was easy to screw it right on to the island.
A hook and bottle opener finish this island.  She is loaded up, ready for a show this weekend--hope she finds a happy home.

Tuesday, October 8, 2013

Charming Chair Chalkboard

Anything with a flat surface can become a chalkboard--doors, books, drawers, table tops, and chairs.  I had one lonely, rusted, metal children's chair that needed a purpose.  

Some spray paint, some chalkboard paint (brushed on), and this lonely chair has a purpose.  
The seat back makes a great magnetic memo board,
and there is a place for a towel,
and of course the chalkboard to leave notes and lists.
Remember to think outside the chalkboard box--what fun surfaces can you use for a chalkboard?


Thursday, October 3, 2013

My First Ikea Hack

I live in Montana, have I mentioned that ;)?  And while I adore it here, we do lack some of the modern conveniences and amenities of living in a larger (as in population, not land size) area. One of those is we have no IKEA in the state.  Yep, tragic, I know, or so I have heard--I have never been in an IKEA.  I believe the nearest one is in Salt Lake?? or Seattle??

As a result, I have been deprived to have no IKEA furniture to hack (which is the new word for repurpose??).  So, when I spied this little piece with an IKEA stamp at a garage sale for $2 I envisioned my first hack.
I think this was the top part of some type of shelf or desk unit, but I saw a bench.  It needed to be made more sturdy and I chose to put a back on it to do that.  I used some tongue and groove reclaimed flooring (?) for the back, attaching two 1x2's on the back of the top and bottom to secure it.
Here is a hint--when putting board together to make a panel of some type or a sign, you need to put two screws in each board at an angle from each other so the panel or sign is not wonky or doesn't move back and forth.
I attached the back panel to the shelf, i.e. bench with screws through the back.  I added a top trim piece to the back wit the brad nailer.
I painted it in Old Ochre from Annie Sloan.
I did a little distressing--but not much, didn't want the blonde pine to show through too much.
I decided it need a little something else so I stenciled home on the back.  
A place to put on and take off shoes, 
a little shelf for baskets for mittens and hats--
perfect for the entry!