Apparently my goal during the 12 Days of Christmas posts is to make the post titles as loooong as possible, haha!

Each year I like to share with you a way to display those treasured Christmas greetings and photos. Sadly, sending Christmas cards seems to be a slowly dying tradition. Which make me sad. I love receiving Christmas cards each year and I enjoy sending them to family and friends. Even though we are a digital, online generation, there is something special opening the mailbox and finding "real mail", happy letters!

But, if you don't "do Christmas cards", this project works great to hold favorite Christmas photos for years past.
*This post contains affiliate links.*

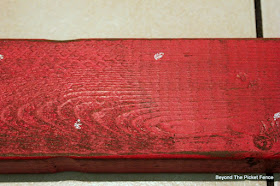
I started with a 25" long pallet 2"x 4" that I painted with Fusion Mineral Paint. This color is Fort York Red and it is the perfect red for Christmas! I sanded a little paint off when it was dry and then applied a little antiquing glaze over it to darken the exposed wood.

I hand lettered a sentiment along the front using Casement from Fusion Mineral Paint.

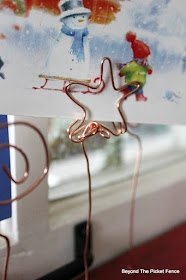
Then, using 16 gauge copper wire, I made card holders. The swirly card holders are easy--simply cut a 12" to 16" piece of wire and shape a swirly circle.

The stars take a little more work. Draw a star on scrap piece of wood and nail into the points and angles small nails with the smallest heads you can find. My star is only about 2" big.

Cut a 14" to 18" piece of wire. Leave a 5" to 8" stem and then starting at the bottom middle wrap the wire in and out, around the nails, going around the star twice.

Next, remove the wire from the nails. This takes a little work, but once you get one section off one of the nails, the rest is easier to wiggle off. Wrap the extra wire tail around the middle angle of the star where you started. You may have a little extra wire to cut off.

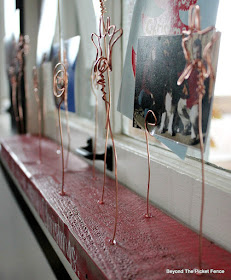
I marked on my red base board where I wanted to drill holes to place the card holders. I made thirteen, but can add more if needed or make a second holder. I plan on doubling up cards and photos.

I used a little hot glue on the end of each wire holder to help further secure it.

I will sit this card holder on my window sill--one would be great on a kitchen window sill--or it would be cute sitting on a shelf or coffee table.
Linking up at Stone Gable! and The Cottage Market!
Linking up at Stone Gable! and The Cottage Market!

Great idea! This could work on the top of the piano. I like the copper wire;)
ReplyDeleteTop of a piano would be great! I love copper and am using lots of it this season!
DeleteYou blow my mind~! Seriously! What a fabulous idea!! Love Love it!!! Thank you for the idea - I think I'll go paint some wood! Yay!
ReplyDeleteThank you Jamie K. Hubby asked, what made you think of this? I said 3 am, haha!
DeleteAhhh! I LOVE the copper star pic holders! I can't wait to make some. I have stars all over my house and look forward to adding these! Thanks!
ReplyDeleteYay, I am glad you are inspired!
ReplyDelete