Monday, October 21, 2013

How To Make a Fall Leaf Triptych

Do you need some fall art?  How about a leaf triptych?
fall leaf reclaimed wood art http://bec4-beyondthepicketfence.blogspot.com/2013/10/how-to-make-fall-leaf-triptych.html
What is a triptych?  

triptych (/ˈtrɪptɪk/ trip-tik; (from the Greek adjective τρίπτυχοs ("three-fold"), from tri-= "three" + ptysso= "to fold") is a work of art (usually a panel painting) that is divided into three sections, or three carved panels which are hinged together and can be folded shut or displayed open. It is therefore a type of polyptych, the term for all multi-panel works. The middle panel is typically the largest and it is flanked by two smaller related works, although there are triptychs of equal-sized panels.
fall leaf reclaimed wood art http://bec4-beyondthepicketfence.blogspot.com/2013/10/how-to-make-fall-leaf-triptych.html
More than you wanted to know, huh?  Making one is easier than the definition.  Start with three pieces of wood that are the same width, but different heights.   I used three different pieces of reclaimed wood, but you could cut one larger piece of wood into three pieces.
fall leaf reclaimed wood art http://bec4-beyondthepicketfence.blogspot.com/2013/10/how-to-make-fall-leaf-triptych.html
I looked up leaf outline shapes and drew one on a folded piece of newspaper so that it would be symmetrical. It took me a couple times to get a leaf I liked. 
fall leaf reclaimed wood art http://bec4-beyondthepicketfence.blogspot.com/2013/10/how-to-make-fall-leaf-triptych.html
Place your three pieces of wood together and trace around the leaf shape with chalk.
fall leaf reclaimed wood art http://bec4-beyondthepicketfence.blogspot.com/2013/10/how-to-make-fall-leaf-triptych.html
Use three or four colors of paint spooned onto a paper plate.  I was out of yellow, so I chose a melon color, green, orange, and red.  This amount shown was way too much--just use a spoonful of each to start.
fall leaf reclaimed wood art http://bec4-beyondthepicketfence.blogspot.com/2013/10/how-to-make-fall-leaf-triptych.html
The paint technique I used is called a dip and drag technique that I first learned from Lake Girl Paints.  You need some small pieces of cardstock or cardboard. I also used a paint brush to stipple and blend some of the colors.  The cardstock will get soggy so you may need a few pieces of it.
fall leaf reclaimed wood art http://bec4-beyondthepicketfence.blogspot.com/2013/10/how-to-make-fall-leaf-triptych.html
Load the cardstock with 2 or 3 colors of your paint and with a light hand, drag the cardstock onto your wood.  Reload with more paint and different color combinations as needed.
fall leaf reclaimed wood art http://bec4-beyondthepicketfence.blogspot.com/2013/10/how-to-make-fall-leaf-triptych.html
Stipple or pounce with the brush when you want to blend the colors more or add a little more of one color.
I added some leaf veins with a brown craft paint.
fall leaf reclaimed wood art http://bec4-beyondthepicketfence.blogspot.com/2013/10/how-to-make-fall-leaf-triptych.html
Lightly sand the leaf when the paint is dry.  I "stained" and conditioned the wood with coconut oil.  A tip:  if your wood is not completely sanded, use a dark rag to apply oil or you will end up with white lint where the wood is not completely smooth.
fall leaf reclaimed wood art http://bec4-beyondthepicketfence.blogspot.com/2013/10/how-to-make-fall-leaf-triptych.html
Attach some picture hanging wire on the back and hang your triptych, leaving about 3/4 of an inch between each piece.
fall leaf reclaimed wood art http://bec4-beyondthepicketfence.blogspot.com/2013/10/how-to-make-fall-leaf-triptych.html
A quick and easy way to add a little seasonal art to your home!
fall leaf reclaimed wood art http://bec4-beyondthepicketfence.blogspot.com/2013/10/how-to-make-fall-leaf-triptych.html

Sunday, October 20, 2013

Sunday Verses

sunday verses http://bec4-beyondthepicketfence.blogspot.com/2013/10/sunday-verses_20.html

Friday, October 18, 2013

Mad For Plaid

I have a personal question for you...how do you feel about plaid?  It seems that most folks have either a love for it, or a strong dislike--dare I say even a hate for it.
mad for plaid http://bec4-beyondthepicketfence.blogspot.com/2013/10/mad-for-plaid.html
Me?  I think it is grand.  Yes, a little stuffy, a little neat and proper and even nerdy.  But, I find it's colors and pleasing array of lines that can vary so simply delightful.  So when I "refound" bits and pieces of a holey plaid wool blanket that I previously used on a stool and bulletin board, 
mad for plaid http://bec4-beyondthepicketfence.blogspot.com/2013/10/mad-for-plaid.html
I decided a little piece of it would work on an old tray I had.
mad for plaid http://bec4-beyondthepicketfence.blogspot.com/2013/10/mad-for-plaid.html
I was planning on using spray adhesive to glue the piece of wool down on the tray ( I did paint the tray red), but then decided who was I kidding, I need something that is a little more washable and durable.  I then decided to use some modge podge to adhere the wool and help make it a bit more durable.  
mad for plaid http://bec4-beyondthepicketfence.blogspot.com/2013/10/mad-for-plaid.html
I did lose the softness of the wool, but figure it will last longer and hot cocoa spills will clean up much easier.
mad for plaid http://bec4-beyondthepicketfence.blogspot.com/2013/10/mad-for-plaid.html
Where in your home can you add some plaid?
mad for plaid http://bec4-beyondthepicketfence.blogspot.com/2013/10/mad-for-plaid.html


Thursday, October 17, 2013

Rest Your Feet

Hello, how are you?  Are you tired and need a place to rest your weary feet?
Drawer ottoman http://bec4-beyondthepicketfence.blogspot.com/2013/10/rest-your-feet.html
How about a cute little ottoman or stool to rest them on?  I know I have shown different versions of these.  They really are quick and easy to make.

Pick up a sturdy, lonely drawer at a thrift store or Habitat Re-store and add some legs--4x4's are sturdy and work well. I always glue them in place first with wood glue and wait for that to dry. I then flip it over and use three screws for each leg to attach them, screwing from the inside.
Drawer ottoman http://bec4-beyondthepicketfence.blogspot.com/2013/10/rest-your-feet.html
I make a top from plywood and use 2x4's on the inside so the lid doesn't slide around.  A little batting and some fabric stapled to the top,
Drawer ottoman http://bec4-beyondthepicketfence.blogspot.com/2013/10/rest-your-feet.html
and a handle painted in a fun blue finish up this easy foot rest/ ottoman/ perch/ stool.
Whatever you choose to call it, it is easy to make and something that not only has some storage, but also gives tired feet and legs a break is a plus in my book!
Drawer ottoman http://bec4-beyondthepicketfence.blogspot.com/2013/10/rest-your-feet.html

Tuesday, October 15, 2013

Junkers Unite With a "Book Runner", A Pin Board, AND a Link Party!

Happy day Junkers!  Do I have something extra fun for you today!  A group of fellow junking bloggers and I have teamed up to bring you a plethora of fabulous, new junking projects, plus more!
For those of you who are new here, welcome!  I am Becky, author of Beyond The Picket Fence.  I love to take discarded items, thrift store finds, and reclaimed wood and transform them into "needful" home decor items for the "country chic" home.  You can see many of my projects here on my blog and can also follow along via Facebook and Pinterest.

Grab your favorite warm beverage, settle in, and enjoy some lovely, junky, doable projects!

This past summer my sweet hubby built me this terrific table from reclaimed wood doors.  And while I love it, lets face it, all that wood screams a little too much testosterone for my taste.  
Thus my need for some color on that wood was born.  And the perfect way to do this without painting it was to add a table runner.  But a typical fabric runner wouldn't work for me, so I created one out of old books (bibliophiles, look away!).
I love books, and old books are the best.  Their warm, musty smell, fantastic fabric covers in great colors, and yellowed pages make me giddy.  I buy most of my old books at thrift stores on half price sale days.  I look for fabric covers (A bonus is these covers are fairly washable.), in colors that appeal to me, and also for the titles and subjects.  For example, I used a trigonometry book because hubby was a HS math teacher, 
an English Lit. book because I taught English, 
and the Underwater Treasure book for its turquoise color.  Think of the different runners you could make--use all children's books if you have younger kids, Christmas books for the holidays, all vintage cookbooks-- the possibilities are endless.
Gently tear the book pages, all together at once from the cover.  You can use an exacto knife along the inside binding if it is too tough to tear out.  SAVE the torn out book to read or use for future projects.
I then laid out the books in the pattern I wanted, turning a couple the other way for interest.  I wanted some of the the runner to hang over the edge of the table--I had to switch a few books out to get the right length for the overhang.  Measure the width of the smallest book cover in your runner and cut a piece of felt that width and the length of your runner.  I used a dark red felt because that was what I had and actually used two pieces to achieve the length I needed.
Hot glue the book covers to the felt.  
It helps if you glue the binding first, pushing it flat, and then glue the rest of the book.  Hint, use a hair dryer on cool to get rid of hot glue "cobwebs". 
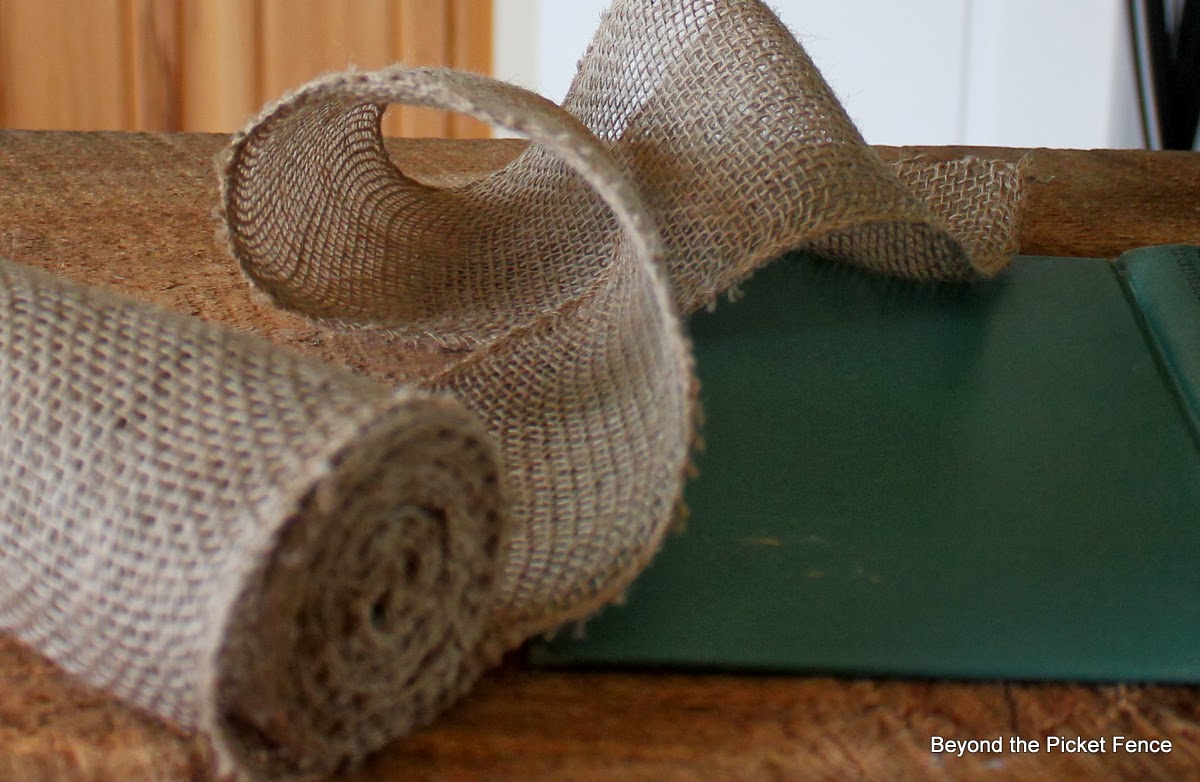
I decided to add a little burlap ruffle to the ends. 
 I love this burlap ribbon from the craft store because the edges are finished.  
Hot glue the burlap on the end books, ruffling it as you go.
Simple and unique--not your typical runner.
Oh, and those book insides?  Stack them in the middle of your runner, 
add a few candles and some rusty junk to make a one of a kind centerpiece!
Pick up a few good books and start creating!  I linked up at KNICK OF TIME.

We junkers have been on pinning frenzy--pinning the best junk out there.  Check out our Junkers United board HERE.

And see all these lovely ladies?  Each one has created a new, junky project and tutorial for you to enjoy. So hurry up and get clicking on the links below!


But wait, that is not all (Do I sound like an infomercial?).  We want to see your junk so link up your own fabulous creations below and we will pin our favorites to the 


Monday, October 14, 2013

Ladder Shelf

Ladder shelves have been around for awhile, but I have never made one until a few weeks ago.
ladder, reclaimed wood, shelf, Beyond The Picket Fence, http://bec4-beyondthepicketfence.blogspot.com/2013/10/ladder-shelf.html
I had a half of a tall ladder, I had used the other half or side for something a few years back.  I screwed barnwood pieces to the rungs, screwing them in from the underside of the rungs.
repurposed, ladder, shelf, Beyond The Picket Fence, http://bec4-beyondthepicketfence.blogspot.com/2013/10/ladder-shelf.html
I added some D rings to the top part of the ladder so it can be secured to a wall.
ladder shelf, wax, old ladder, wood, reclaimed, repurposed, Beyond The Picket Fence, http://bec4-beyondthepicketfence.blogspot.com/2013/10/ladder-shelf.html
I decided to leave it in its natural wood state--which doesn't happen often.  It went to a new home this past weekend.
salvaged, decor, shelf, ladder, barn wood, Beyond The Picket Fence, http://bec4-beyondthepicketfence.blogspot.com/2013/10/ladder-shelf.html

Friday, October 11, 2013

Colorful, Scrap Wood Photo Display

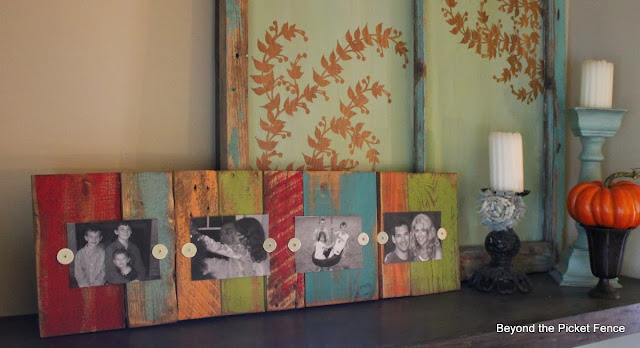
pallets, scraps, frame, photo holder, paint, http://goo.gl/mHMD53I used a long board across the back to connect the pieces,


Using some of my leftover scrap wood pieces from other projects, I ,made this "frame".
scraps, pallet wood, frame, photo holder, http://goo.gl/mHMD53
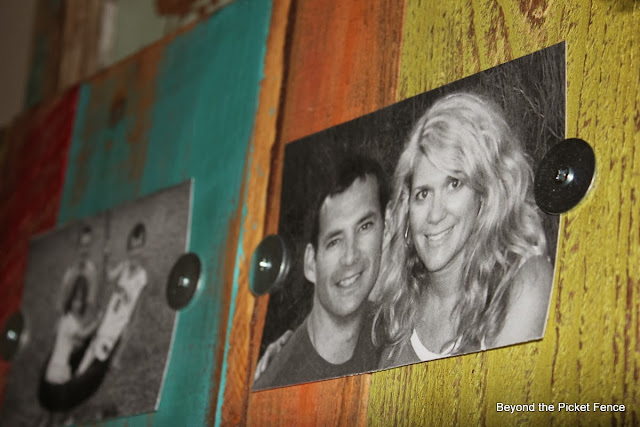
and big washers set 6 inches apart to hold the pictures.
pallets, scraps, salvaged, colorful paint, photo display, http://goo.gl/mHMD53
This can hang either way, horizontally or vertically 
photo display, pallet wood, scraps, colorful paint, http://goo.gl/mHMD53
and is made for 4x6 pictures, but I think would hold 5x7's as well.
photo display, pallet wood, salvaged, scraps, frame, http://goo.gl/mHMD53
Can't wait to play around with this idea and build other shapes and sizes.
pallets, scrap wood, photo display, colorful paint, frame, DIY, http://goo.gl/mHMD53