Thursday, March 30, 2023

Reframing a Thrift Store Vintage Crewel

When I was in Jr. High in Northern California we had the opportunity to take some pretty fun, groovy, and cool electives because it was the late seventies and I think the adults knew that crafts and using our hands and play were good for our development. One class that I took was an entire quarter of stitchery where we sat around and embroidered and needlepointed, cross-stitched and did crewel work. I know I still have a couple of those stitcheries...somewhere. It was such a relaxing part of the school day.

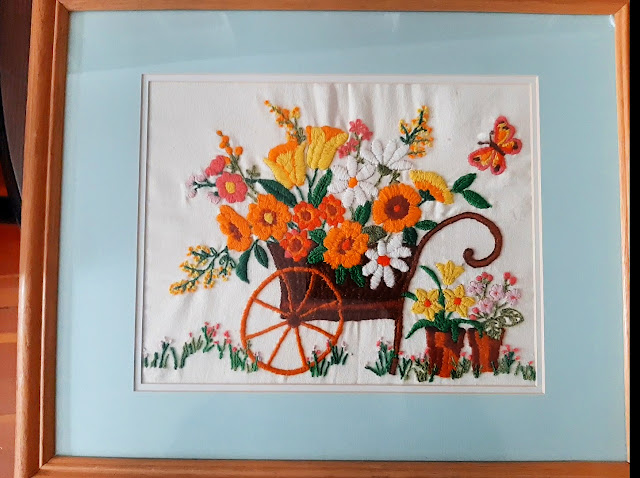
Seventies and eighties stitcheries are making a huge comeback in home decor. And while they are becoming more pricey and more elusive, there are some really sweet and great pieces still out there in thrift store land. Here is the BEFORE of a crewel artwork piece that I recently bought at a favorite local thrift store. 

Reframing a Thrift Store Vintage Crewel
It was cute as is, but a little wrinkly and even though the blue mat looks like it could be surrounding sky, there is no blue in the stitchery. I decided to reframe it.
Reframing a Thrift Store Vintage Crewel
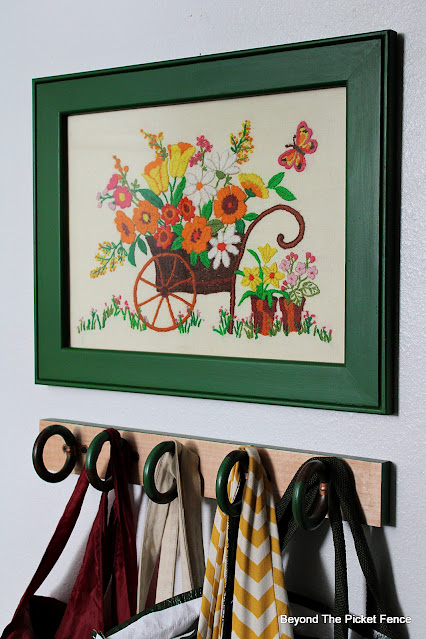
I recently got two 50 year old watercolor paintings for $3 each. They came in these frames that were painted barn red. I removed the paintings because They were wrong in these frames. I painted one green for the crewel.
Reframing a Thrift Store Vintage Crewel
The green brings out the green in the art. Framing something in a darker color than the background helps to really, well, frame it. I ironed the crewel. Look for a date on stitched pieces as they often have dates in the corners.
Reframing a Thrift Store Vintage Crewel
After ironing, I stretched over the piece of foam core board that was in the frame I used. I taped the middle sections on all four sides first with packing tape. I then taped the corners and finally the rest of the sides, continuing to stretch the fabric tight. 
Reframing a Thrift Store Vintage Crewel
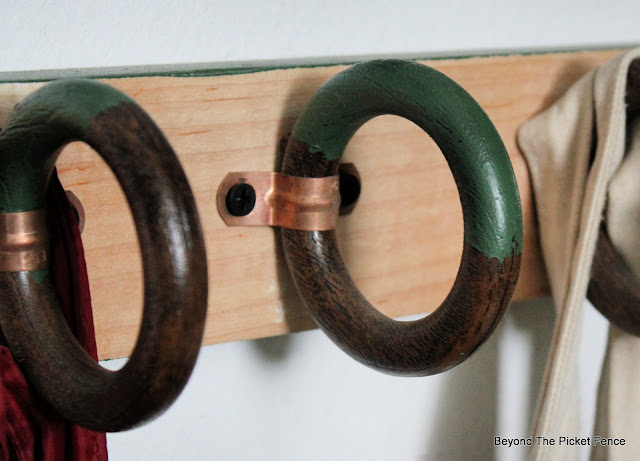
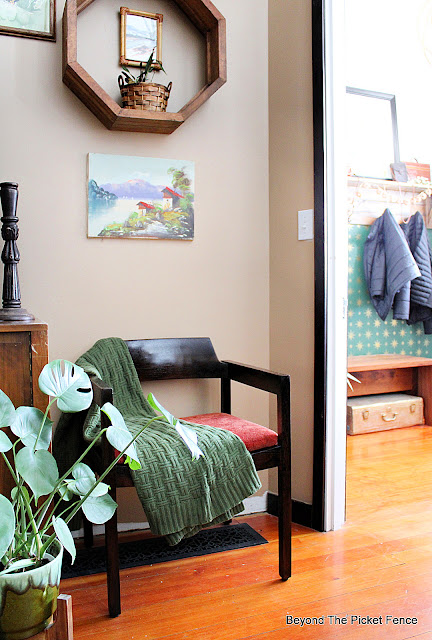
This vintage, bright, and cheerful crewel artwork is hanging in my mudroom above my reusable shopping bag hanger. It is okay to decorate your utility spaces like mudrooms and laundry rooms. I made this bag hanger from wood curtain rings. I shared the tutorial HERE.
Reframing a Thrift Store Vintage Crewel
Full disclosure here: after a few months some of the rings that I had originally glued broke off. I ended up using copper pipe or strap U clamps to better secure them. The bag holder still work great. The artwork I had hanging here ended up on my gallery wall in my bedroom reading nook.
Reframing a Thrift Store Vintage Crewel
This little wall space is next to the half bath that we just remodeled. It really does add a bit of sunshine to this space. I love the memory of my junior high stitching class that these vintage crewels evoke and the hip and happy vibe is a welcome addition.

Tuesday, March 28, 2023

A Springy Treat Tray

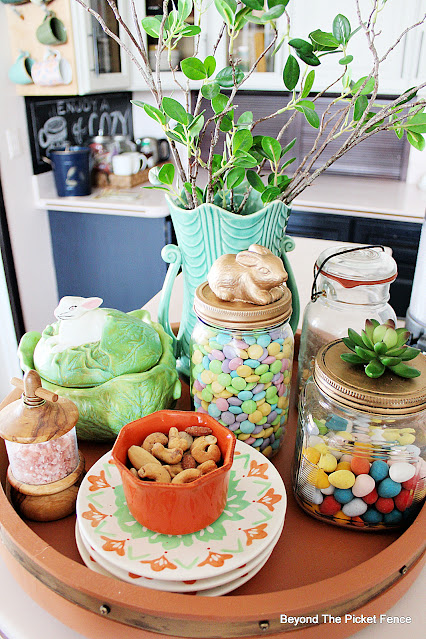
Okay, I promise I really am using way less seasonal and holiday decor and have very little to store away. But, I did decided to add a wee bit of spring to the treat tray or "station" that sits on my counter. 
Add Easter Candy to a snack station
I shared in February that I had added this lazy Susan that I painted burnt orange to my counter. This space is on the corner and completely out of the way. I keep treats and snacks on it. Everyday decor for it includes blue pieces.
Use a lazy susan as a snack station
The blue went up in the cupboard until May, and I added some thrift store finds and a couple items I made. I also had a FAILED project for the tray that ended up in the trash. I will share that in a minute.
Cabbage Ware dish
I picked up the cabbage ware covered dish a few months ago. Cabbage ware is hot this year for spring, but I had no idea when I bought it. I just liked it. It holds some wrapped hard candies.
Vintage Hull Draped Vase
The vintage draped Hull vase is a recent thrift store purchase. it is a different green from the cabbage ware, but that doesn't bug me at all--I love using all the colors. The faux branches are also thrifted and are so realistic looking and were only 50 cents total. I love the height and life they add to the snack vignette.
Easter Candy Jar
So, on this larger, squatty jar lid I thought I would make a cabbage leaf from homemade baking soda and cornstarch clay.
A Springy Treat Tray
I did a layered leaf and thought it would look pretty good with paint after it dried. But...it broke and fell apart as it dried. I first I tried to fix it, but by the next morning it was unfixable and ended up in the trash.
Antique gold rub-n-buff
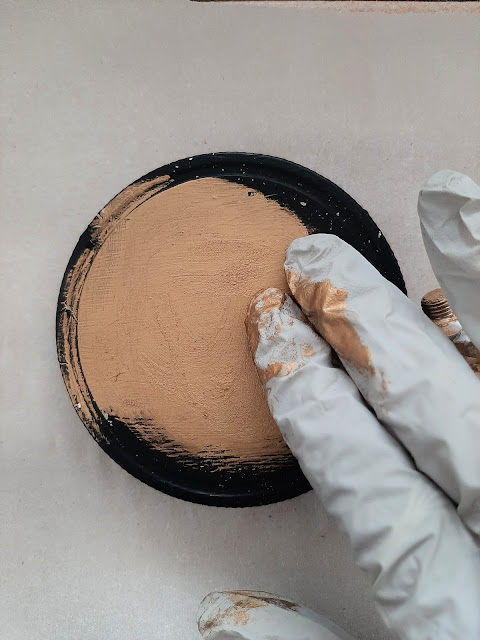
I washed the lid and used antique gold Rub-n-Buff on it (I had painted the lid with chalkboard paint several years ago). 
Faux succulent
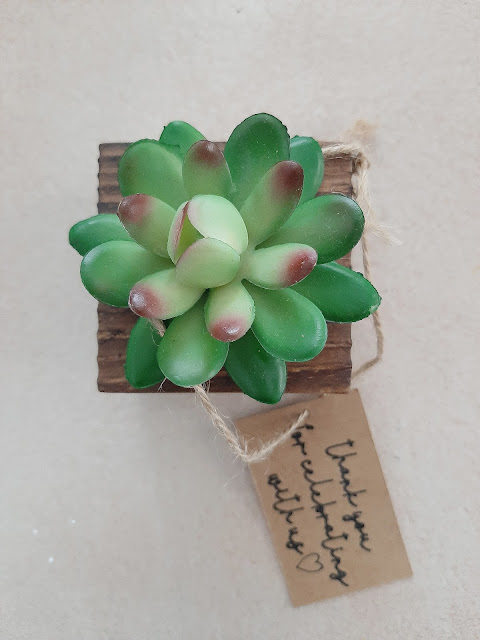
I looked around and had this little faux succulent I had recently picked up at the thrift store (someone's leftover wedding favors as there were several of them). I liked the green and touch of pink on it so I pulled it out of the wood block, cut the stem, and hot glued it to the gold lid. 
A Springy Treat Tray
This jar may stay out as it isn't necessarily just spring. Cadbury mini eggs now come in bright rainbow colors which makes my rainbow loving heart happy.
Easter candy
For the spring colored M-n-M jar I hot glued a canning lid to the ring and then used then hot glued a $1 thrift store bunny to the top. I used the Antique Gold Rub-n-Buff on all of it, using a small, old paintbrush to get into the tiny spaces.
A Springy Treat Tray
A dish of mixed nuts sitting on a stack of small dessert plates and a vintage canning jar with peanuts are a regular part of the snack station.
salt grinder
A salt grinder also sits on the tray.
A Springy Treat Tray
It's fun to have treats out for the family and for guests. The mini eggs test my willpower, but a few after dinner are a sweet treat. After April, the gold bunny jar lid will go into the cabbage dish and go up in the cupboard. The green vase might go on display on top of my cupboards or I might sell it (I am not a vase collector). So, see I won't really have more spring decor to store. 

Thursday, March 23, 2023

Thrift Store MCM Chair Makeover

At first glance when I spied this chair at the thrift store, I thought, eh, typical office chair. But, when I looked at it a second time, I decided I liked it's shape and I liked the wood chair back as opposed to an upholstered back and the mid-century modern vibe. So, I bought one (there were three, but I left the others for someone else).
Thrift Store MCM Chair Makeover
I did pick the chair that was in the best shape. When I got it home and removed the seat,
Thrift Store MCM Chair Makeover
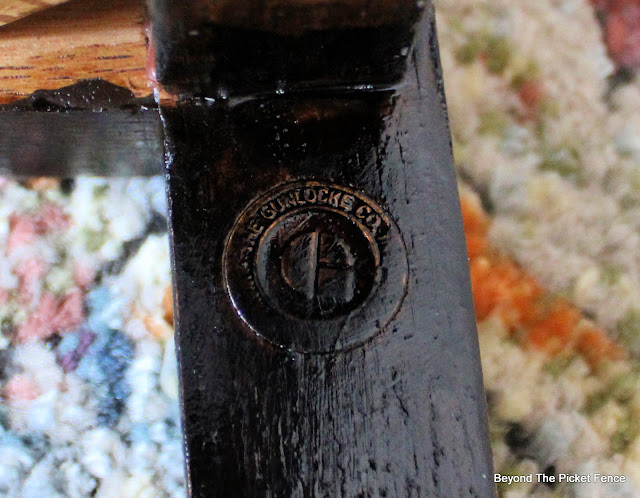
I found a brass, inlaid marker for the chairmaker--The Gunlocke Co. from NY. 
Thrift Store MCM Chair Makeover
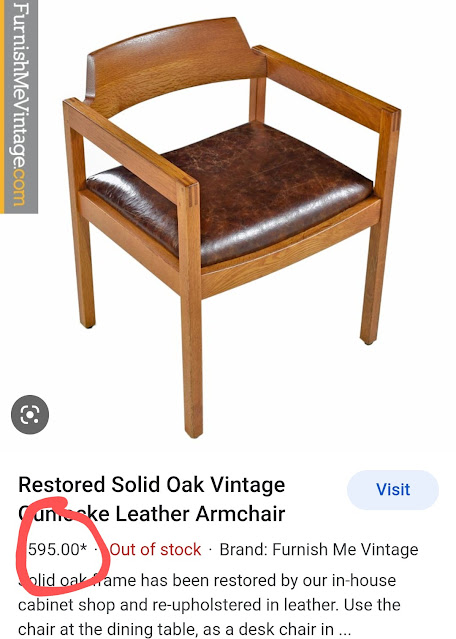
Gunlocke started manufacturing chairs in 1902. And while the chair pictured billow does have a leather seat, it is the same chair I thrifted.
Thrift Store MCM Chair Makeover

Don't get me wrong, i don't believe I can sell my chair for $600. In the antique business we say something is worth how much someone is willing to pay. But, searching for and researching a piece does tell me that it is a well made piece and isn't trash.

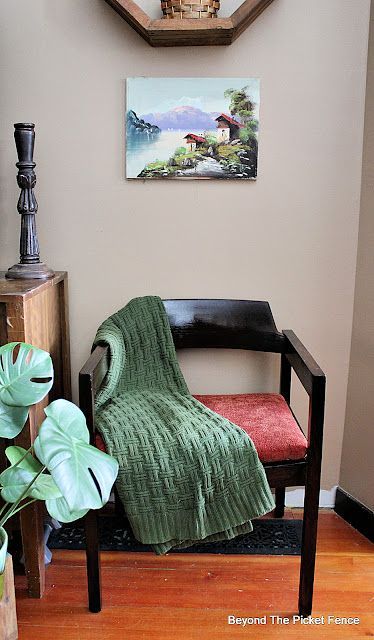
I pictured the chair dark with a velvety, rich, jewel-toned seat and I love how it turned out.

Thrift Store MCM Chair Makeover
Keep reading to see how I gave this tired, thrifted, office chair a classy update and makeover.
Thrift Store MCM Chair Makeover
I sanded the finish off the chair. I know light, scrubbed, raw wood is quite popular right now, but I wanted a rich, dark walnut look which is a mid century modern wood color. I used dark walnut Minwax stain, giving it three coats.
Thrift Store MCM Chair Makeover
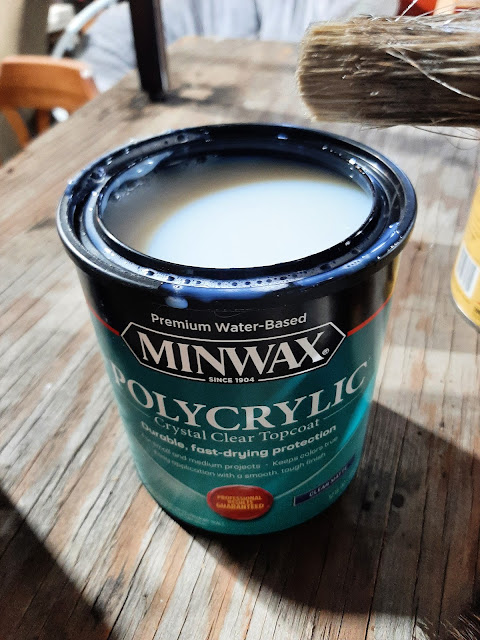
I brushed on Minwax Polyacrylic in a Matte finish for a topcoat. I like polyacrylic because it does go on nicely, is water clean-up, and dries quickly. It does drip and puddle easily so you need to continue to walk around your piece and looks for drips and white spots.
Thrift Store MCM Chair Makeover
It took me a month to find what I wanted to use to recover the seat. I wanted something in a jewel tone--green, gold, orange with a velvety texture. I looked at the thrift stores and the fabric store. I finally found two heavy curtain panels. I also bought a yellow gold, stretchy velour fabric remnant at the thrift store. I let my instagram followers vote and the rusty-orange curtain panel won.
Thrift Store MCM Chair Makeover
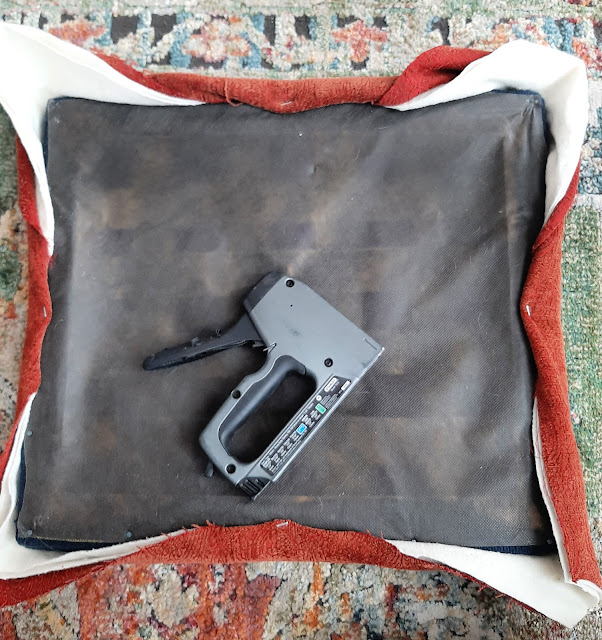
After washing the curtain panels, I cut around the chair seat, leaving plenty of fabric to go up around the cushioned seat. I also added a couple layers of quilt batting to give it a little extra cush.
Thrift Store MCM Chair Makeover
I always staple the middle of the four sides first.
Thrift Store MCM Chair Makeover
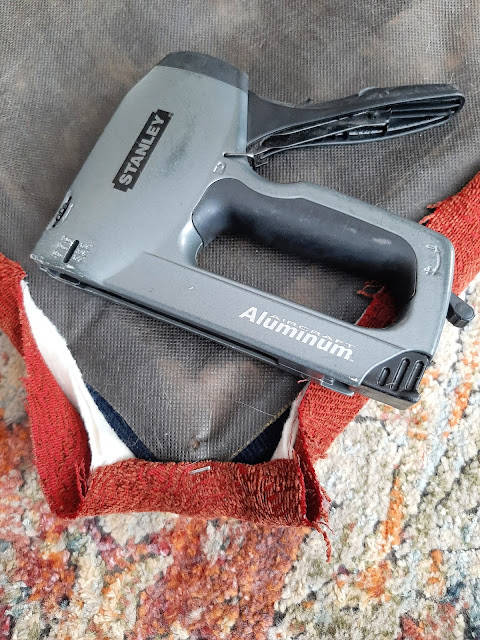
Next I trim the fabric and batting at the corner and staple it.
Thrift Store MCM Chair Makeover
After the corners are good and tight, I staple the edges, starting in the middle of the corner and the middle, and then the middles of that and so one.
Thrift Store MCM Chair Makeover
The color of the dark wood and the fabric look so nice together.
Thrift Store MCM Chair Makeover
This is the type of chair that looks great sitting against a wall in the family room or in the corner in a guest bedroom. It isn't something you want to curl up in to binge watch your favorite show, but is perfect extra seating for guests or to sit and read or place to rest while taking your shoes off. 
Thrift Store MCM Chair Makeover
I try so hard to not regret the things I didn't buy, but now that I see this MCM chair upcycled I do wish i would have bought two. They would be so cute side by side with a table in between, sigh...
Thrift Store MCM Chair Makeover

Tuesday, March 21, 2023

Adding Sunny Yellow to the Front Porch

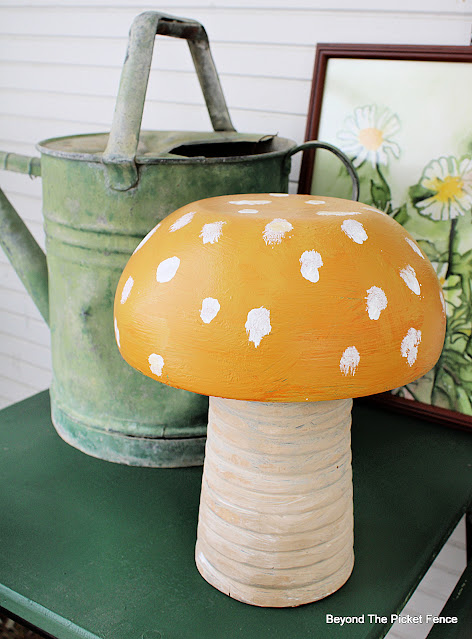
If you have been following along with me this year, you probably know that I am doing less seasonal decorating in my home. But, my covered front porch is one spot that I still plan to change up seasonally. I started last week when I added the golden yellow mushroom I made form thrift store finds.

Adding Sunny Yellow to the Front Porch
 I decided this thrift store, vintage, sugar firkin ice bucket made by the Basketville Putney, VT CO. would be a great piece to add some more yellow too.
Adding Sunny Yellow to the Front Porch
I got this at the local thrift store for $4, which is a pretty darn good buy. It does have the plastic bucket insert and a tight fitting plastic lid inside the wood lid for an ice bucket. These were made in the nineties. I wiped it down well with both Dawn soap and then white vinegar as it was greasy and then lightly sanded it. I taped off the handle and painted the rest of the bucket a golden, cheerful yellow color.
Adding Sunny Yellow to the Front Porch
This post contains affiliate links.
I used Folk Art's One Golden yellow paint. I like the built in finish and how smooth this paint goes on. It does take a few coats to cover darker wood. You can buy it HERE.
Adding Sunny Yellow to the Front Porch
I like this golden yellow color because it does work well through the seasons--it looks good with pinks and greens in the spring, reds and more yellow in the summer, oranges and browns in the winter, and dark greens for winter. 
Adding Sunny Yellow to the Front Porch
I added some faux flowering branches to the yellow bucket. These came in a thrifted wood vase I bought. I was more interested in the vase, but they are really nice looking branches. 
Adding Sunny Yellow to the Front Porch
I cut some curly willow branches from our tree, cutting the more yellow branches, which were the newer growth last year. Adding real branches to fake ones, helps the arrangement to look more authentic.
Adding Sunny Yellow to the Front Porch
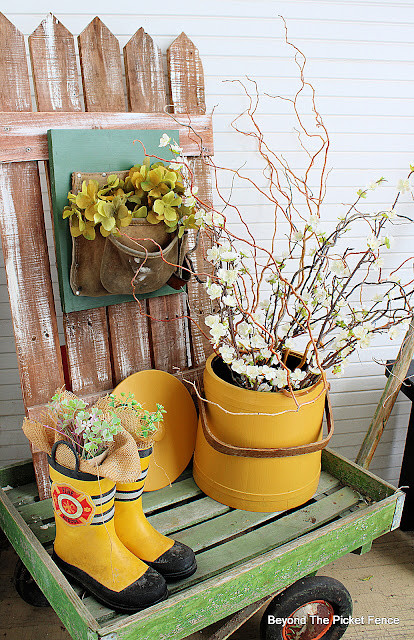
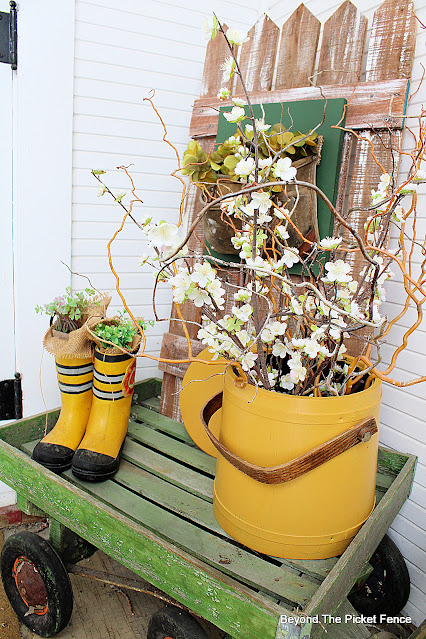
I set the yellow, springy bucket on the green wagon that is a decorating staple on my porch. I just set the lid propped against the picket fence that I made several years ago. The leather tool belt pouch has become a yearly item hanging on the picket fence. I stuffed some green hydrangeas from the thrift store in it. Next to the yellow firkin sits some yellow boots that I got at the thrift store a few years ago. I added rocks to weigh them down, a little burlap, and some fake springy plant. 
Adding Sunny Yellow to the Front Porch
I love the sunny yellow and green on the porch. It is such a lovely way to welcome spring and guests to our home.

Monday, March 20, 2023

Moody Makeover for a Small Half Bath

Do you have areas in your home that might need a makeover but you tend to ignore them because you rarely use or notice them? Such was the case with this small (2.5'x 6'), CARPETED😧, half bath in our mudroom.

Moody Makeover-for a Small Half Bath
When we decided we needed to replace the thirty year old, slow flushing toilet in our main bath we decided to also replace the old toilet in the half bath.
Moody Makeover-for a Small Half Bath
This post contains affiliate links for your convenience at NO EXTRA COST to you. I may receive a small compensation if you choose to buy something from a provided link.

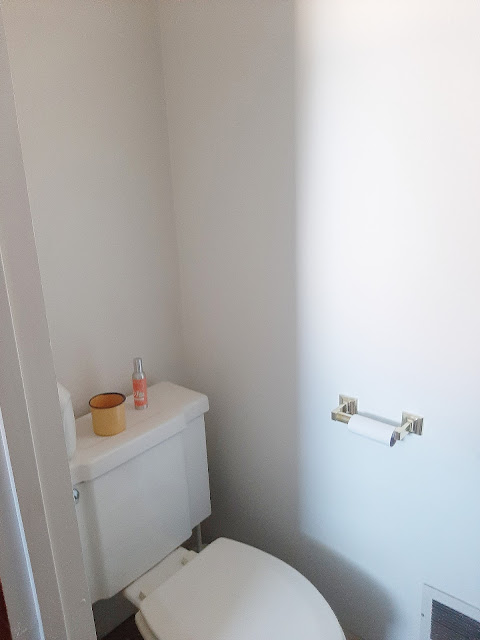
As you can see, the bathroom had the same flat carpet as the mudroom. It was all white with a small, enamel sink, which is the only item we kept. Above the sink was a mirrored medicine cabinet that was not in the wall, but stuck out from it. There was no place to store cleaning items or extra toilet paper. I decided that a new toilet called for a complete makeover of the small half bath.
Moody Makeover-for a Small Half Bath
This small space is really hard to photograph so I will share snippets of the space. I started with painting it black. What, paint a small space black?! You bet!! It doesn't make it any smaller, but definitely makes it warmer and moodier and less institutional bathroom like. 
Peel and Stick Black and White Flooring
After ripping out the carpet, I painted the sub-floor with latex primer and then used this black and white, peel and stick floor tiles that you can GET HERE. It only took two boxes and I am very happy with how it well it is sticking and I love the pattern and the bright white. Be sure to follow the instructions and let the tile acclimate to your home temperature before using it. Hubby installed the new toilet as the flooring was put in around it. the toilet is from Lowes. 
 
Next to the toilet sits a thrift store wastepaper basket that you can see a peek of. It doesn't fit anywhere else in the small bath. On the other side of the toilet there is a plunger and a toilet brush because come one people, let's have those items available to guests without them having to ask for them in case they need it.
Moody Makeover-for a Small Half Bath
I built a shelf to fit under the small, original sink. I built the ladder type structure with the two dowels, one for the shelf to rest on and one for the towel bar. I painted ladder piece black and added Antique Gold Rub-n-Buff (BUY HERE) to the towel bar. A wood shelf sits on the bottom rung and on braces painted black and attached to the wall. I cut a rectangular notch out of the wood shelf to fit around the rather odd and irregular plumbing.  I left the wood a natural color to match the mirror and the other wood tones in the half bath. On the shelf sits a couple extra rolls of TP that are reachable from the throne and a gold wire basket with cleaners in it.
Moody Makeover-for a Small Half Bath
The wire baskets came from the dollar spot at Target. I don't buy much from there, but I knew the small size of these and their gold tone would work perfectly in the half bath. But, only one fits well on the shelf, so I put the other one on the toilet with a tissue box in it.
Moody Makeover-for a Small Half Bath
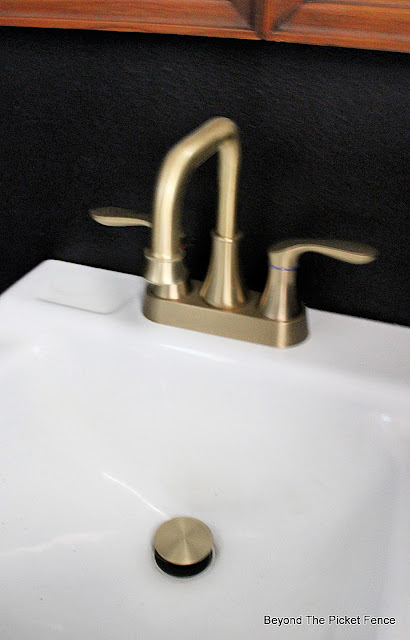
While we left the original sink (even though there is a small chip in it in the upper right corner), we changed out the faucet. I love the brushed gold faucet I chose from Amazon HERE. Not only does it look great, but the price was fantastic and it came with excellent instructions and a number to call if you needed any backup help when installing.
Moody Makeover-for a Small Half Bath
I can't think of a better way to update a bathroom sink than with fresh hardware.
Moody Makeover-for a Small Half Bath
Instead of the metal, medicine cabinet, above the sink I hung an antique mirror from the thrift store. It looks really dirty in this picture, but that is because I blurred the photo a little. In actuality, the mirror is speckled with some clouding from behind. It doesn't bug me at all as it shows its age well.
Moody Makeover-for a Small Half Bath
The antique arched mirror is made from two matching, vanity side mirrors. I bought them to use them on either side of my bed, but they didn't work there. When they were sitting on the floor next to each other I saw an arched mirror. I wouldn't necessarily want a seam or line down a mirror that I used daily to get ready with, but in a half bath where someone is looking in it as they are washing their hands, it is just fine. The warm wood is so nice against the black wall. You can see the simple light fixture in the mirror that we used to replace the utility light that was in here. It is nothing fancy, but fits the space well and gives off a lot more light. It came as a two pack HERE. The second light replaced the mudroom light outside the bathroom door.
Moody Makeover-for a Small Half Bath
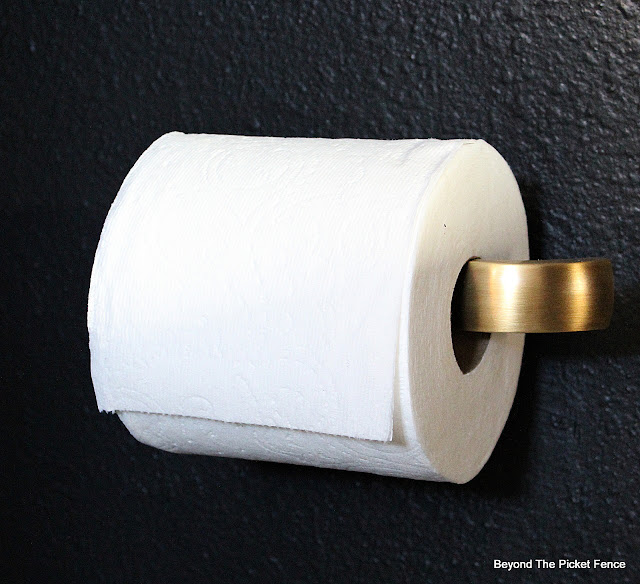
I was willing to repaint the old toilet paper holder, but it was broken so instead I bought this NEW ONE. HINT--a toilet paper holder with an open end should be mounted with the open side AWAY from the toilet so that the roll of toilet paper does not come off when tearing TP off the roll.
Moody Makeover-for a Small Half Bath
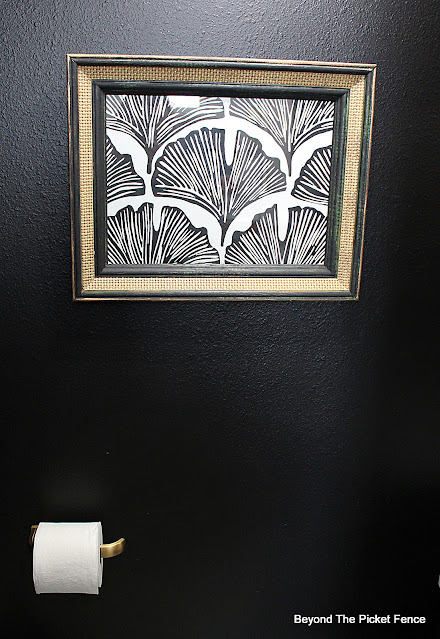
On the wall that you see looking in from the door, I hung this wallpaper scrap art that I made from thrift store finds. You can see that post HERE.
Moody Makeover-for a Small Half Bath
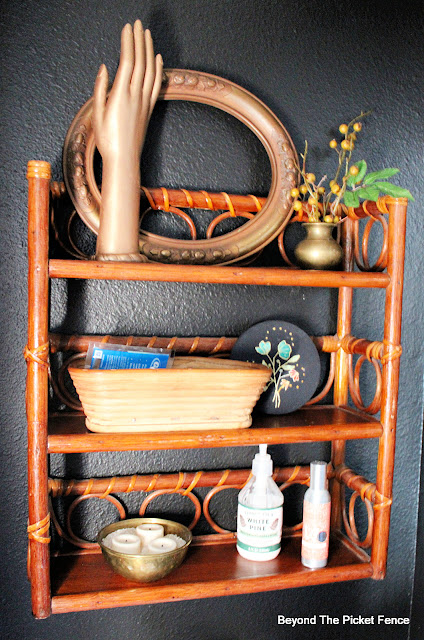
Above the toilet I hung this thrift store, bamboo shelf. I didn't really need it for more storage, but it does add a lot of personality and helps to incorporate the color and texture theme in the half bath. The warm, reddish orange color matched the wood on the antique mirror and the wood sink shelf.  I styled the shelf with antique brass items and fun, thrift store finds to add unique personality.
Moody Makeover-for a Small Half Bath
A small brass vase holds faux berries and greenery. Behind that sits a vintage, gold, oval frame. A small, hand-stitched floral, crewel sits behind a vintage, bamboo, oval basket that holds hotel toiletries for guests.
Moody Makeover-for a Small Half Bath
I knew the other side of the shelf needed some height on the top shelf so I styled it with a fake hand from the thrift store that gave an antique brass Rub-n-Buff makeover to. We have a beauty school in town so there are often random hands and heads at the thrift store. On the bottom shelf sits some room spray and lotion and a vintage brass bowl with rice and battery operated tealight candles (to turn on when have guest over).
Moody Makeover-for a Small Half Bath
Katie Saro from The Art of Vintage on The Magnolia Network says every room needs the following: something vintage, an antique, a color scheme, something handcrafted, and something weird just for the sake of being weird. I set out to follow that formula in this tiny half bathroom: VINTAGE-- the brass objects and the bamboo basket, ANTIQUE--the mirror, COLOR SCHEME--black, white, brass, warm wood, HANDCRAFTED--the small embroidery, WEIRD--a gold hand.  

We spent just under $300 on this half bath makeover, with more than half of that cost being the new toilet. It is fresh and quirky and looks so much better than its carpeted, outdated, tired predecessor. It makes me smile when I see it now, rather than just wanting to ignore it by shutting the door. Tackle those spots in your home that bug you, it feels so good.