Tuesday, February 28, 2023

Thrift Store Lazy Susan Snack Tray Makeover

Y'all, thrift stores are getting a little bits nuts with their pricing. So, if you can hit a half price sale, by all means, take advantage of those. That's what I did on President's Day and I did come home with some great finds, like this Lazy Susan.
Thrift Store Lazy Susan Snack Tray Makeover
This was priced at $12 and I am sorry, but nope, I am not paying that much for an item that is from Target or World Market and is easy to find and is not real, solid wood. But, for $6, I decided to buy this and give it a quick makeover.
Thrift Store Lazy Susan Snack Tray Makeover
I decided to paint a fun color (Glazed Pot) because accessories are a great way to add pops of color without a huge commitment or cost. Keep reading to see how to quickly makeover a thrift store Lazy Susan and to read about how I am using this in my kitchen. 
Thrift Store Lazy Susan Snack Tray Makeover
When buying Lazy Susan's at the thrift store, make sure they spin well and hold them up to eye level to make sure they are not warped. Items like this made nowadays warp fairly easily. The wood look on this wasn't bad, but greyish and dull, so that it why I decided to paint it.
Thrift Store Lazy Susan Snack Tray Makeover
Rather than taping off the metal band around the Lazy Susan, I decided to see if I could remove it. I was happy to find that it was not glued on and that it was attached with fake screws or rivets.
Thrift Store Lazy Susan Snack Tray Makeover
I didn't sand this piece at all because it wasn't glossy, but I did wipe it down with white vinegar to remove dust and grease.
Thrift Store Lazy Susan Snack Tray Makeover
Next came deciding on a color. Because I will change out the items I display on this tray, I wanted something that would work with some different colors and I wanted something fun that went with my putty and navy colored cupboards. I chose Glazed Pot that works with the blue items that I display everyday on it. It will also work with the greens I plan to use for Easter and spring and with the yellows I will add for summer. It will of course work with fall colors. Christmas, I am not so sure, but I will wait until December to decide on that.
Thrift Store Lazy Susan Snack Tray Makeover
I used Antique Gold Rub-n-Buff to the metal band. I used Polyacrylic clear coat on the tray since it is in the kitchen and I will be wiping it down. 
Thrift Store Lazy Susan Snack Tray Makeover
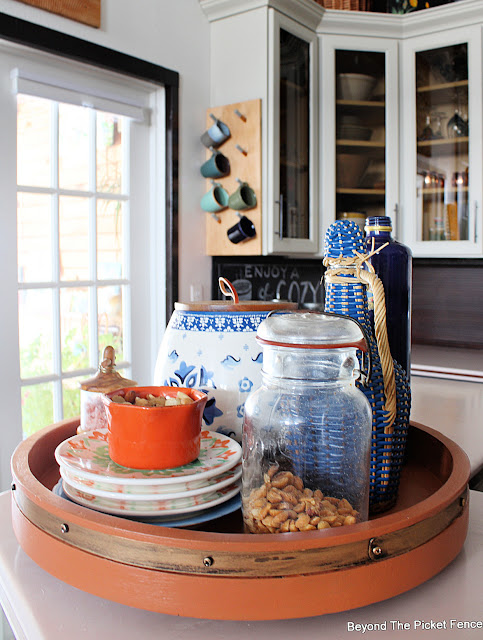
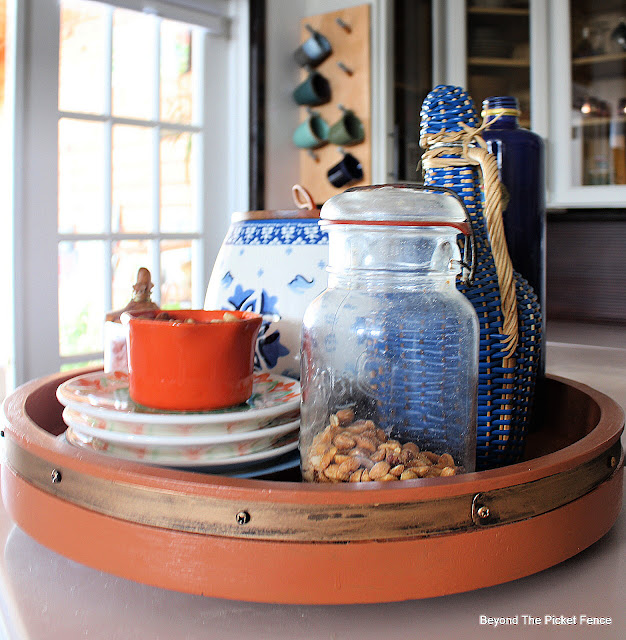
I reattached the metal band and dabbed the Rub-n-Buff on the screws. This is a snack tray that sits on the corner of my bar height counter that is our eat-in counter. The round shape fits better nicely on the corner, better than the rectangular tray I have been using. Everything on it except the food is from a thrift store.
Thrift Store Lazy Susan Snack Tray Makeover
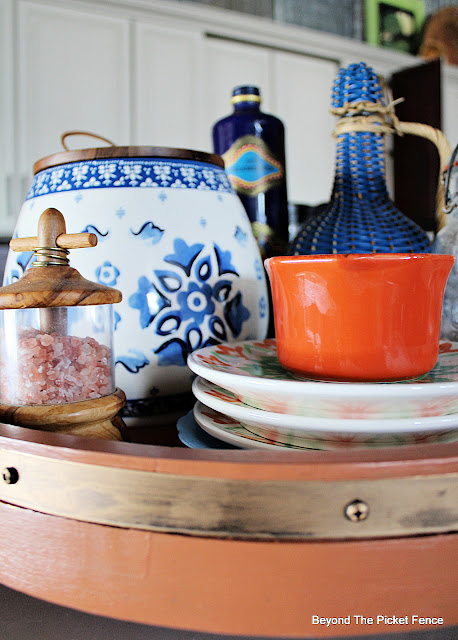
Because we are trying to eat a little healthier, there are too many sweets on the Lazy Susan snack tray yet. There are some dark chocolates in the blue and white container. Nuts in a vintage jar and a small bowl are the other snacks currently on the tray. The little plates are nice if someone wants to grab a little more than a handful of items. The salt grinder is convenient to reach for anyone eating at the counter.
Thrift Store Lazy Susan Snack Tray Makeover
The vintage blue demijohn and wine bottle help to add more color and height to the snack vignette. I will put branches to force in the wine bottle soon. 
Thrift Store Lazy Susan Snack Tray Makeover
If you are a neutral kind of a person or are afraid of color, think about adding it in small, subtly inexpensive ways. Take advantage of thrift store half price days and remember, paint is a quick, easy, and inexpensive way to make something old new for you.
Thrift Store Lazy Susan Snack Tray Makeover


Friday, February 24, 2023

Styled Bookshelf Details

Yesterday's post was all about my restyled and repainted bookshelves. I gave you lots of tips for styling bookshelves. 
Styled Bookshelf Details
Today, I am sharing the details on the items that I used to style the shelves.
Styled Bookshelf Details
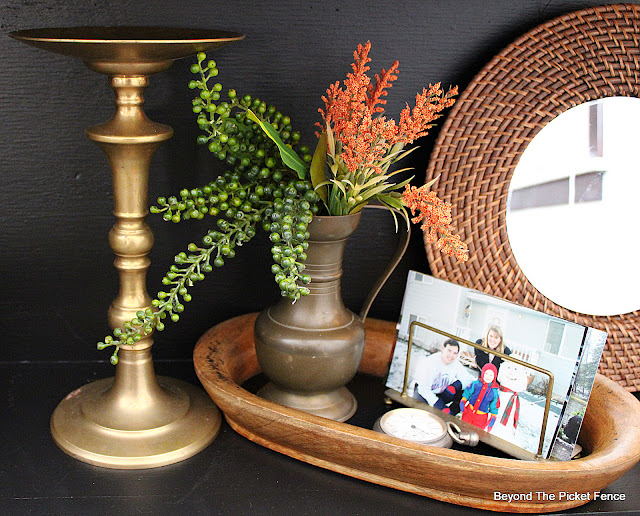
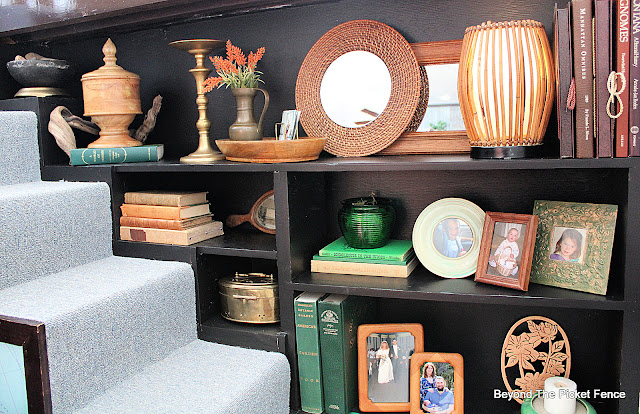
One tip I shared is to repeat elements like the antique brass items here, all from the thrift store. The brass napkin holder works as a photo holder. I am not a huge fan of fake flowers, but these shelves do not get enough light for real plants, so I added a bit of color to a brass pitcher. The thrifted candlestick adds height. Gathering smaller items on a tray or plate helps to create a cleaner look. This little wood, that is clearly not for food (it had 2 stickers and one stamp on the bottom indicating that), is thrifted. The pocket watch was my grandpa's. Mirrors reflect light and are great placed in the back of a bookshelf. This one I made by gluing a round mirror to a thrift store rattan plate charger.
Styled Bookshelf Details
The thrift store wood urn sits on a thrift store book. Behind it is a favorite piece of driftwood. 
Styled Bookshelf Details
I don't like containers to sit empty with no purpose so I put the old anagrams that I previously displayed in a wood bowl in the wood urn. They may make an appearance at holidays to spell out a word or two. 
Styled Bookshelf Details
On the top shelf on the left sits a black pottery bowl (old or not, I am not sure) from a thrift store with the heart shaped rocks we collect on outings and adventures. To help the black bowl stand out a bit, I set it on a thrifted, brass pedestal that clearly held something else at one point.
Styled Bookshelf Details
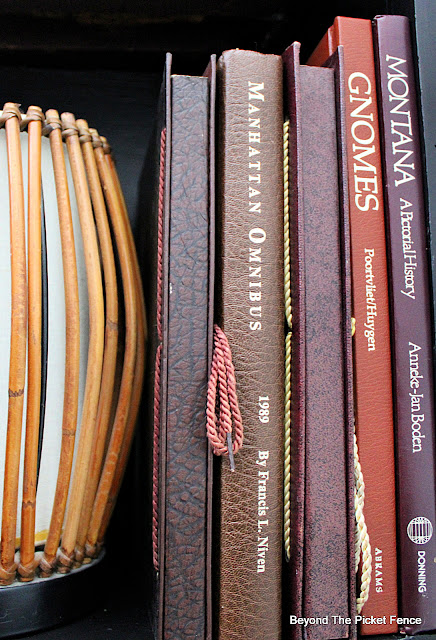
Because these are bookshelves, I want actual books on them. This stack of old books, a couple leather bound, are all from the thrift store and add great texture and warmth. An antique, oak hand mirror sits next to these old books, against the back of the shelf.
Styled Bookshelf Details
These books are not as old and are ones I had in my library. I like their warm, brown color. The gnome book is from the seventies, so vintage.
The two with tied with cords are from the sixties and are the Leaves of Gold books--a collection of poems, essays, and quotes.
Styled Bookshelf Details
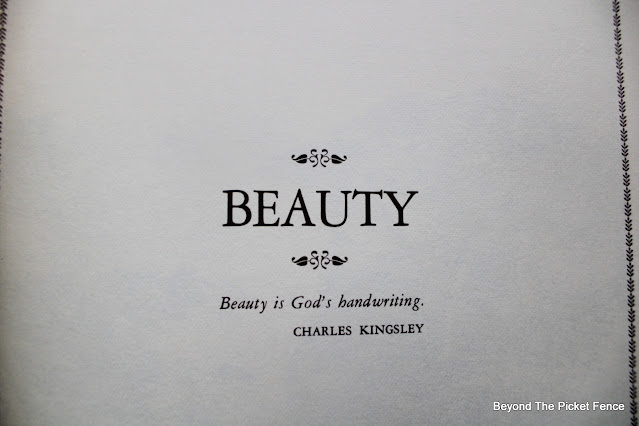
They are nice to have, especially if you need a good quote.
Styled Bookshelf Details
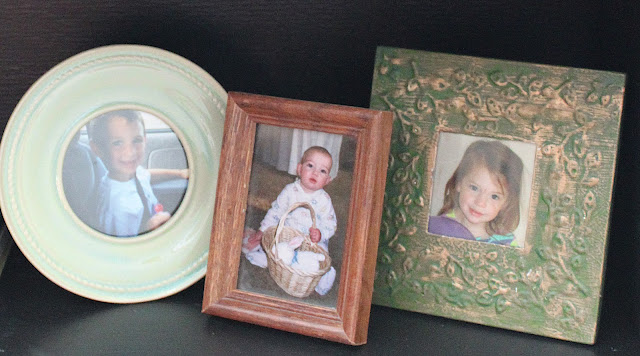
Three favorite pictures of my children sit on a shelf. The square frame with my daughter's picture was very white and so 2005 shabby chic. I painted it green and added some antique gold Rub-n-Buff.
Styled Bookshelf Details
Next to the photos I placed a simple, green, glass vase with moss in it on some old books. I pushed these back a bit because they aren't anything special and the color stands out so they don't need to be in the forefront. 
Styled Bookshelf Details
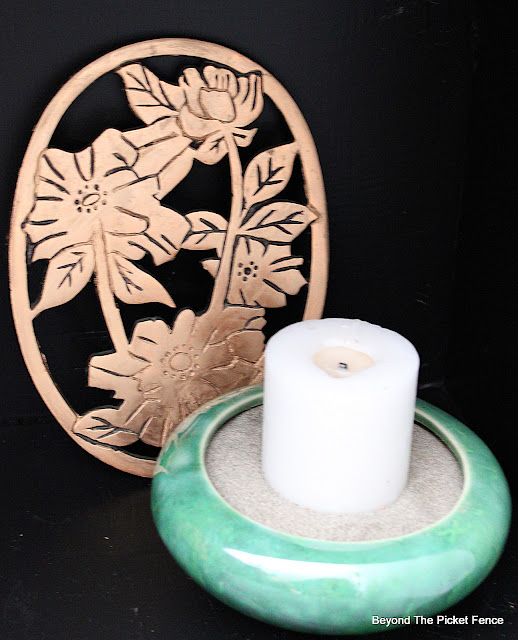
On the bottom shelf sits more thrift store finds. The trivet was copper, I gave it the antique gold Rub-n-Buff treatment. The pottery dish holds sand from a trip from a beach somewhere (?) and a candle. 
Styled Bookshelf Details
Also on the bottom shelf sits our wedding photo and a picture of my son, daughter-in-law and grandson. These got new frames, well new to me from Goodwill. They help to repeat the wood elements on the shelves. A couple old, green books from my library complete this shelf.
Styled Bookshelf Details
Use items you love, change or paint things to better match your style, repeat elements, add layers, mirrors, and add or delete as needed to create cozy shelves with personality!

Thursday, February 23, 2023

How to Style Dark & Moody Bookshelves

If you read my previous post, you know I decided I needed to repaint the built in bookshelves that are next to the narrow stairs that go up to my lofted library. Just about seven years ago we removed a shelf here to have taller shelf space and I painted the bookshelf a light grey color, the same color as my great room wall. The shelf was originally a dark, glossy, reddish brown color and I wanted to lighten them up.
How to Style Dark & Moody Bookshelves
Fast forward seven years and I have repainted the light grey wall and have phased most of the grey out of my home. Dark. moody, black rooms and walls, and bookshelves are trending and I am here for it. I think when black is paired with warm woods, and rattan, and textures that it is much warmer than a cool grey or bright white.
How to Style Dark & Moody Bookshelves
I don't always jump on the trend train, but if I like it and if it is something relatively inexpensive and easy to change like paint, then I am all for it. But, I hope you all know trends come and go and you should decorate and style your home in the way that you love. If you want to try trends, try them in small ways--paint, accessories, pillows.
(This post contains affiliate links at NO extra cost to you.)

So, I removed everything from the shelves, cleaned them and painted them black. FYI, I do not like this bluish, grey carpeting, but not sure it is changing anytime soon. I might get a runner for the stairs...
How to Style Dark & Moody Bookshelves
Keep reading to get tips for styling shelves. If you read my previous post, you saw that I gathered different items from around my home and from my thrift store finds and put them on a black background, a sweater, to see if I would like the colors and textures I wanted against the black background. I gathered way more items that I ended up using. I knew I wanted wood, green, antique brass, old books, family photos.
How to Style Dark & Moody Bookshelves
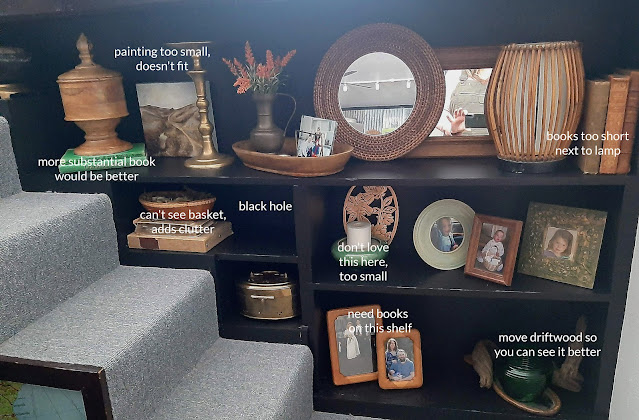
After gathering items, start placing them where you think you will want them and take pictures. Looking at a picture helps you to better see what works and what doesn't. 
How to Style Dark & Moody Bookshelves
Here was one of my first stylings. I removed some items, moved some, added and deleted.
How to Style Dark & Moody Bookshelves
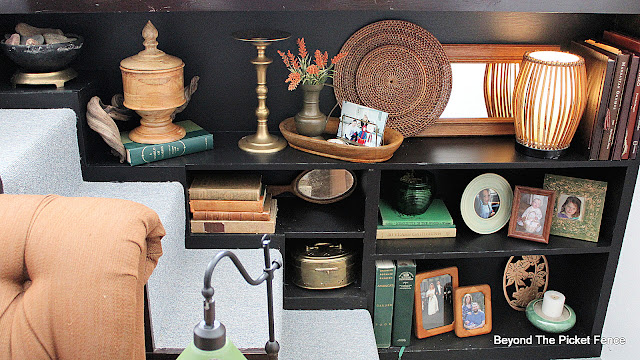
Repeat elements!! I have wood on all the shelves, green, antique brass. 
How to Style Dark & Moody Bookshelves
Layer items and place smaller items on a plate, tray, or bowl to make them look less cluttered. Create smaller vignettes on shelves and vary the heights of objects so that eyes move from item to item. some symmetry is okay, but remember that the rules of three is more pleasing to the eye. Do not center items in the middle of the shelf. Place some items at an angle, but do not angle everything. 
How to Style Dark & Moody Bookshelves
Peek-a-boo--photographing mirrors is never easy. Adding this thrifted, bamboo light really gives the bookshelves a warm glow. Is there an outlet on these shelves? Nope! Instead, I wrapped up the cord and tucked it behind the lamp and used a MAGIC lightbulb. It is a rechargeable lightbulb that comes with a remote. You can BUY IT HERE. I love it--it has three different brightness settings and is perfect for a spot you need some light, but don't have an outlet.

Come back tomorrow and I will share more about the individual items on these bookshelves--what I thrifted, what I made or changed, and why it works. 

Tuesday, February 21, 2023

Bookshelf Makeover and Mood Board

Ch,ch,ch,changes are a common theme around my home, at least when it comes to decor. I love to decorate and style so that is partly the reason things are constantly changing. And when one thing changes, it leads to another and then another...

I took a shelf out of this library staircase bookshelf and painted it light grey about seven years ago. 
Bookshelf Makeover and Mood Board
I used the same light grey paint that I used on my great room wall. But, I have since repainted that wall as I am phasing out the grey in my home. So, I have decided I want to repaint the insides of this built-in shelf. 

And while I wanted to lighten them up before, now I am thinking I want to paint them black. Yes, dark and moody is a current trend and I am loving it. Paint is an easy thing to change so I don't mind hopping on the trend train with it if I like it. I wanted to see what the black background might look like with the items that I may be using to decorate and style the shelf with so I made a mood board or collection.
Bookshelf Makeover and Mood Board
If you have watched the show Capturing Home on Magnolia Network you have seen the designers create some fabulous mood boards before they start a space. A mood or inspiration board is nothing new, but creating one with actual physical objects is a twist on the typical inspo board.
Bookshelf Makeover and Mood Board
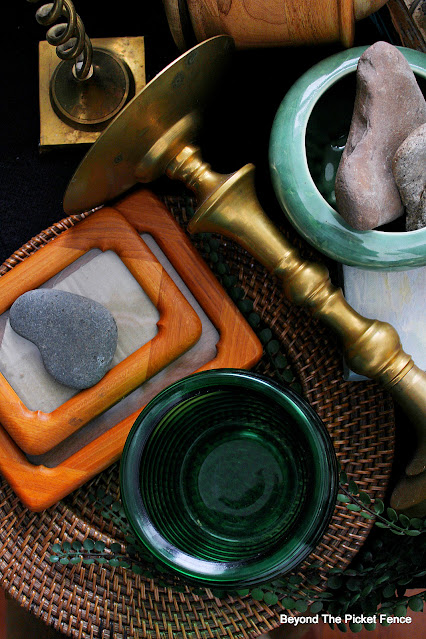
I grabbed a black sweater of mine to use as a background. I wanted to make sure that the items and colors that I want to style the shelf with won't get lost with the black. Although, I covered up the black quite a bit, my curated collection pops and shines against the black background.
Bookshelf Makeover and Mood Board
Creating a mood board gives you a good idea about how items will work together. I collected things from my home that had texture and warmth, natural and organic vibes--wood, brass, rattan, green. 
Bookshelf Makeover and Mood Board
I might not use all of these items, but taking a photo of this curated collection gives gives me a great idea on how I want my finished shelves to look--cozy, warm, organic, fresh, and personal. 
Bookshelf Makeover and Mood Board
The next time you are redecorating or restyling a space, even if it is just a bookshelf or a coffee table, curate a mood collection and take a picture of it. Gather items you have, something to represent the colors you want to use and the style or feeling you want to create. Decide what works and what you might want to edit. Have fun and create spaces that reflect who you are.

Wednesday, February 15, 2023

How to Scribble Paint to Create a Vintage Style Painting

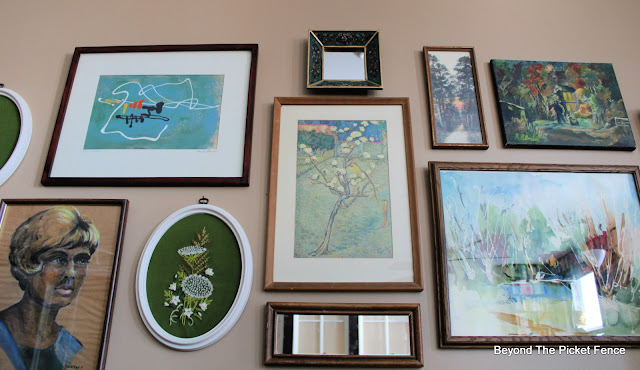
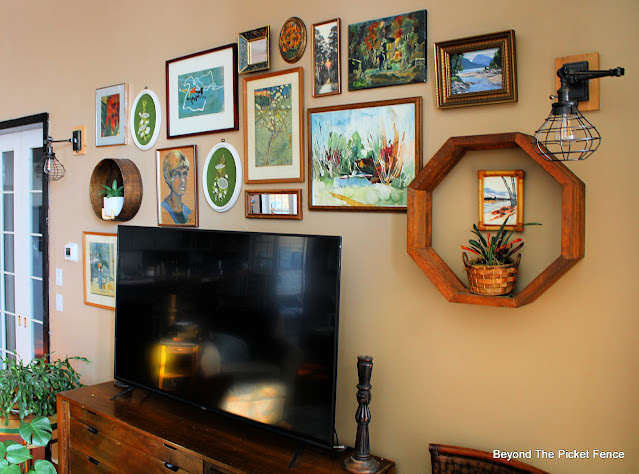
I have shared this gallery wall in my great room before. It has changed a bit as I repainted the wall a warm tan color and I moved the art up to accommodate hubby's bigger TV. 
How to Scribble Paint to Create a Vintage Style Painting
I rearranged it a bit after Christmas and decided the square mirror above this vintage, thrifted picture left a little too much space an a bit of a hole.
How to Scribble Paint to Create a Vintage Style Painting
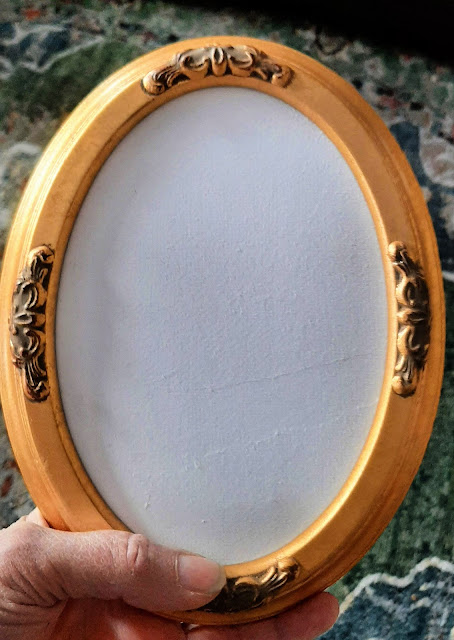
I set out to find something to put next to the square mirror. I decided I wanted a small, oval picture. Everything on this wall is from a thrift store or a garage sale. All of the art ties together with common repeated colors--oranges, blues, greens, and themes--nature and floral (except the modern abstract painting and the portrait that I have dubbed my mom, even though it is not her). I couldn't find an oval painting but settled on an oval frame with a blank background in it.
How to Scribble Paint to Create a Vintage Style Painting
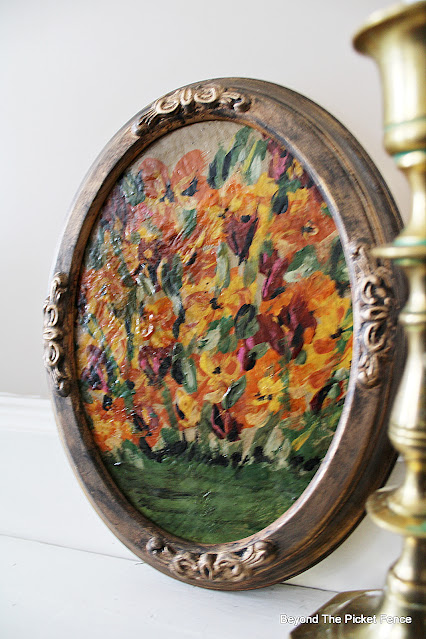
I thought about putting a picture from an art book in the oval frame, but decided to first try my hand at painting something on the blank background. I chose to do an abstract floral and I am very happy with the final results.
How to Scribble Paint to Create a Vintage Style Painting
First thing I did was antique the very bright and shiny gold frame with antique gold Rub-n-Buff and black paint. 
How to Scribble Paint to Create a Vintage Style Painting
The blank canvas in the oval frame had a piece of white paper glued on the top of the canvas. I held the canvas up to the light and it looked blank, like nothing precious is hiding under the white paper. I painted the background tan. For this painting I used craft acrylic paints.
How to Scribble Paint to Create a Vintage Style Painting
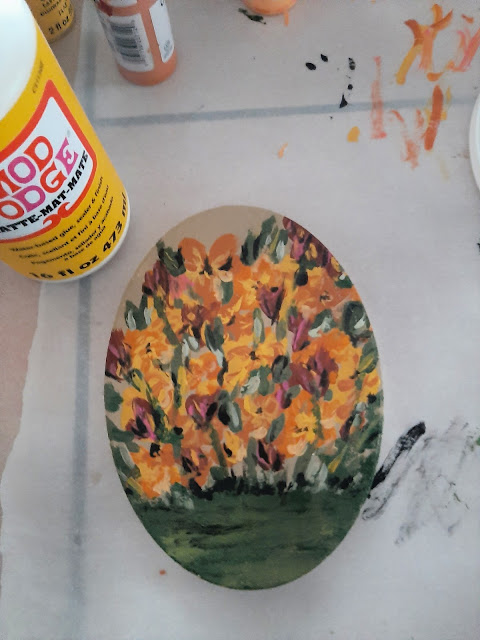
When the tan paint was dry, I started what I call scribble painting with yellows and oranges and dark red. I really just scribble painted blobs and a sort of tulip shape with the dark red. I though I would paint a vase, but filled so much of the area, I decided to just add some ground.
How to Scribble Paint to Create a Vintage Style Painting
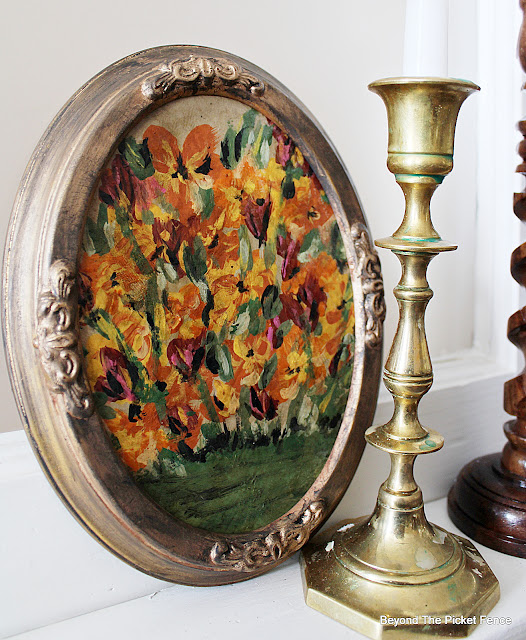
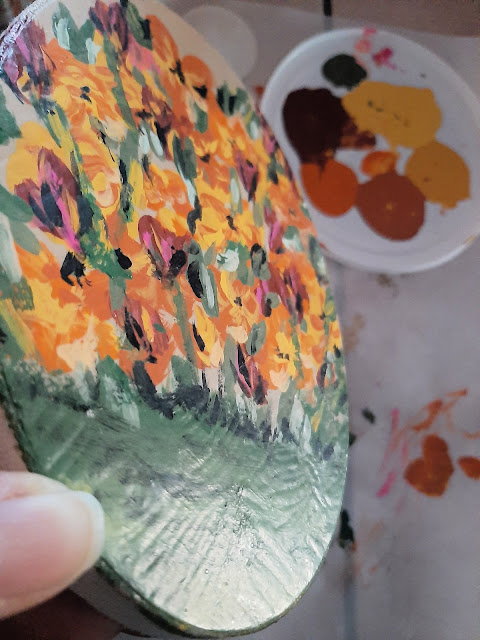
I start with the lightest color and then continue to the darker colors, not washing my paintbrush in between. When the initial scribbled blobs were dry, I added details with other colors and black and painted green here and there. When the painting was dry, I used Matte Mod Podge all over the painting with a stiff-bristled brush, painting the glue in different directions. When this dries, it adds all kinds of lovely texture and gives it a slight sheen that makes it feel like an oil painting. 
How to Scribble Paint to Create a Vintage Style Painting
See that texture?
How to Scribble Paint to Create a Vintage Style Painting
When the Mod Podge was dry, I wiped dark walnut stain over the whole painting. It doesn't stick to the Mod Podge a bunch, but it does add some darkness and age.
How to Scribble Paint to Create a Vintage Style Painting
Little paintings like this are cute propped on a windowsill.
How to Scribble Paint to Create a Vintage Style Painting
I moved the mirror over and hung the new, vintage style floral next to it.
How to Scribble Paint to Create a Vintage Style Painting
I am happy that the hole is filled and enjoyed playing with paint.
How to Scribble Paint to Create a Vintage Style Painting
This wall full of vintage, amateur art brings so much warmth and personality to my great room space. The colors and themes give the wall a cohesive look.
How to Scribble Paint to Create a Vintage Style Painting
Try your hand at scribble painting. It is fun to play and I love that it gives you the ability to customize art for your spaces.