Here is the pallet I started with:
Oops, one side, what was the middle piece, is in rough shape.
Oh well, it is pallet wood, not going for perfection here so I glued and screwed it.
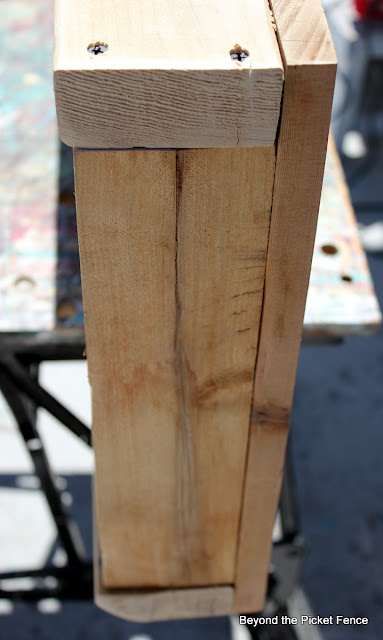
I then added end pieces for looks, but also to make the piece more sturdy. These too are from a pallet.
Next come legs--as you can see these are cut from pallets as well, see all those nails? Remember, pallet wood is less than perfect, look carefully to get straight pieces.
I put 2 screws in from the side, 3 along the front--usually I only use 2 screws in each place--But I got a little excited this time :).
This next step is crucial for squaring up the piece. Add a piece of wood between the legs. Measure the distance at the top part of the legs and cut your board this length. Use a clamp to help hold it on place. It was at this point with this particular bench that I realized the two ends were a half of an inch different in widths. PALLET WOOD IS NOT PERFECT and working with it is not for those who cannot go with the flow, i.e. my once a math teacher husband who likes percision. 

Here is the bench at this point:
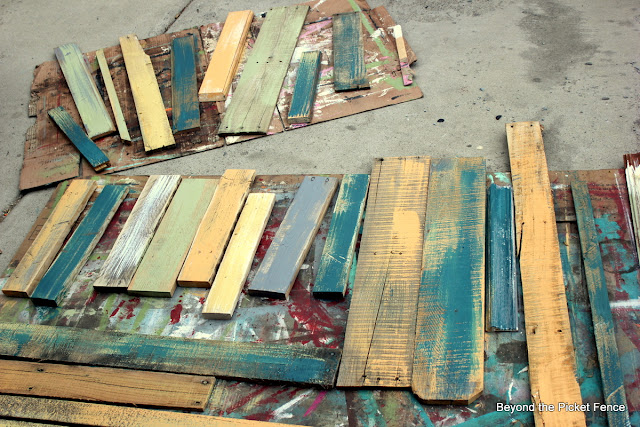
Next comes cutting the wood to fill in the bench or table. This too was from a pallet. Because this bench is a little more narrow on one end, I had to cut and number my pieces. Normally I randomly cut and paint wood pieces and then fill them in where they fit. I decided since I was painting wood for the bench, I might as well paint some other pieces for future projects.
I was a little concerned with this color scheme that I chose--am I resurrecting the 80's? Peach, teal, grey--really Becky? What can I say? I was feeling it!
I painted the legs and "frame" also:
Okay, I forgot to take any pictures after this point, but I used the nail gun to the attach the boards, sanded and stained it. So many possibilities to make this your own--use different colors, different sizes of pallets, add a shelf to the bottom and have fun!
Find more ideas at Funky Junk Interiors.


Great tutorial, thank you for sharing it. It's amazing what can be done with a pile of wood stripes, the colors are wonderful and it looks aged. I liked it very much.
ReplyDeleteFabulous! I love your multi-coloured projects!!
ReplyDeleteWayyyy cool!!! I just love it!
ReplyDeleteYou've inspired me once again!
ReplyDeleteGreat Job I love it! - thank you so much for sharing this. CJ
ReplyDeleteLove this! Your use of colors is always so fun and interesting.
ReplyDeleteFantastic Becky!!! I am going to do this. I need some benches/tables around the back yard and in my laundry room-these are perfect. I am also thinking that this technique would work on an extra long serving table for outside on the patio too. Thanks for showing the steps here.
ReplyDelete@ 3Beeze Homestead
LOVE this! It looks so easy and that top is just so eclectically cool.
ReplyDeleteShared on FJI Facebook and pinned for SNS 133. :)
https://www.facebook.com/photo.php?fbid=10150910128306141&set=a.192514281140.164586.175378011140&type=1&theater
Donna
Very nice!! I just saw a commercial for Living Spaces and they are featuring furniture in "reclaimed wood". Once item is painted almost identical to yours!!!
ReplyDeleteI love the colors!
ReplyDeleteBeautiful!
ReplyDeleteKathy
ohhh, you've gone and done it again. I want to be like you when I grow up! Love your paint technique. I'm going to try it one of these days!
ReplyDeletegail
Seriously, I love everything you do with pallets. I'm going to have to get going and make just one of something you have done.
ReplyDelete~Bliss~
Question, did you sand after you painted to get the weathered look? Or is that the technique you used to paint?
ReplyDeleteThanks!
Sooo how do you achieve the wonderful PAINT TECHNIQUE? That's what I'm interested in... beautiful table!
ReplyDeleteI love the bench and the colors are just amazing! It totally rocks!
ReplyDeleteYou've rocked it again, Becky!
ReplyDeleteI am in love! I wish I owned the tools to make these amazing projects.
ReplyDeleteI just love your pallet bench and am sharing it today on Friday Finds.
ReplyDeleteMust. learn. paint. technique. Please share.
ReplyDeleteCan you please share your paint technique?
ReplyDeletefavoloso!!!!
ReplyDeletemonica
I LOVE LOVE LOVE this...thank you for the tutorial, I needed a little shove in the right direction!
ReplyDeleteIt´s sooooooo beautifull!!!!! I love it!!!! Thanx for shearing it!!!
ReplyDeleteThank you for sharing. It's very nice and helpful.
ReplyDeleteYour spelling isn't all that great.
ReplyDeleteI Love this tutorial...can I Pin It?
ReplyDeletehermoso
ReplyDeleteMolto bello! From Italy
ReplyDeleteBeautiful work Becky! Love your eclectic style!
ReplyDeleteVal @artsybuildinglady.blogspot.ca
This is beautiful! Great inspiration, thank you!
ReplyDeleteOk, I'm so making this!!! Way too cute! Thanks Becky!
ReplyDeleteI love this idea! I am pretty good with power tools and I love rustic furniture, so this is just a perfect fit for me. I will have to build this soon.
ReplyDeleteJane | http://www.palletworks.net.au/services-guarantees
I the the originality with the several colors. Beautiful work! Another site that has awesome pictures and DIY articles is www.palletfurnitureonline.com
ReplyDeleteBuenísima idea. Queda preciosa.
ReplyDeleteSaludos.
What kind of paint did you use? Latex? Was the stain oil based?
ReplyDeleteTell us more on how to paint to look like this please.
ReplyDelete