Thursday, February 9, 2023

Cute Compost Can

My youngest turned 21 this past weekend. I put together a cocktail statin for her with vintage decanters, cocktail and shot glasses, bar tools, and an ice bucket. Most of the items came from the thrift store. But, the one item I couldn't find at the thrift stores after searching for two weeks was an ice bucket so I bought a new one. Wouldn't you know it, the day after her birthday I found two ice buckets at the thrift stores. I decided to buy this white metal one because I knew that I needed something like it for a different purpose.
Cute Compost Can
We are composters and love turning garbage into gold (or really good dirt). We have been putting our food scrap to compost in a little plastic bowl on the kitchen counter that is near the back door. 
Cute Compost Can
A larger container with a lid is the perfect solution to the overflowing, plastic bowl situation.
Cute Compost Can
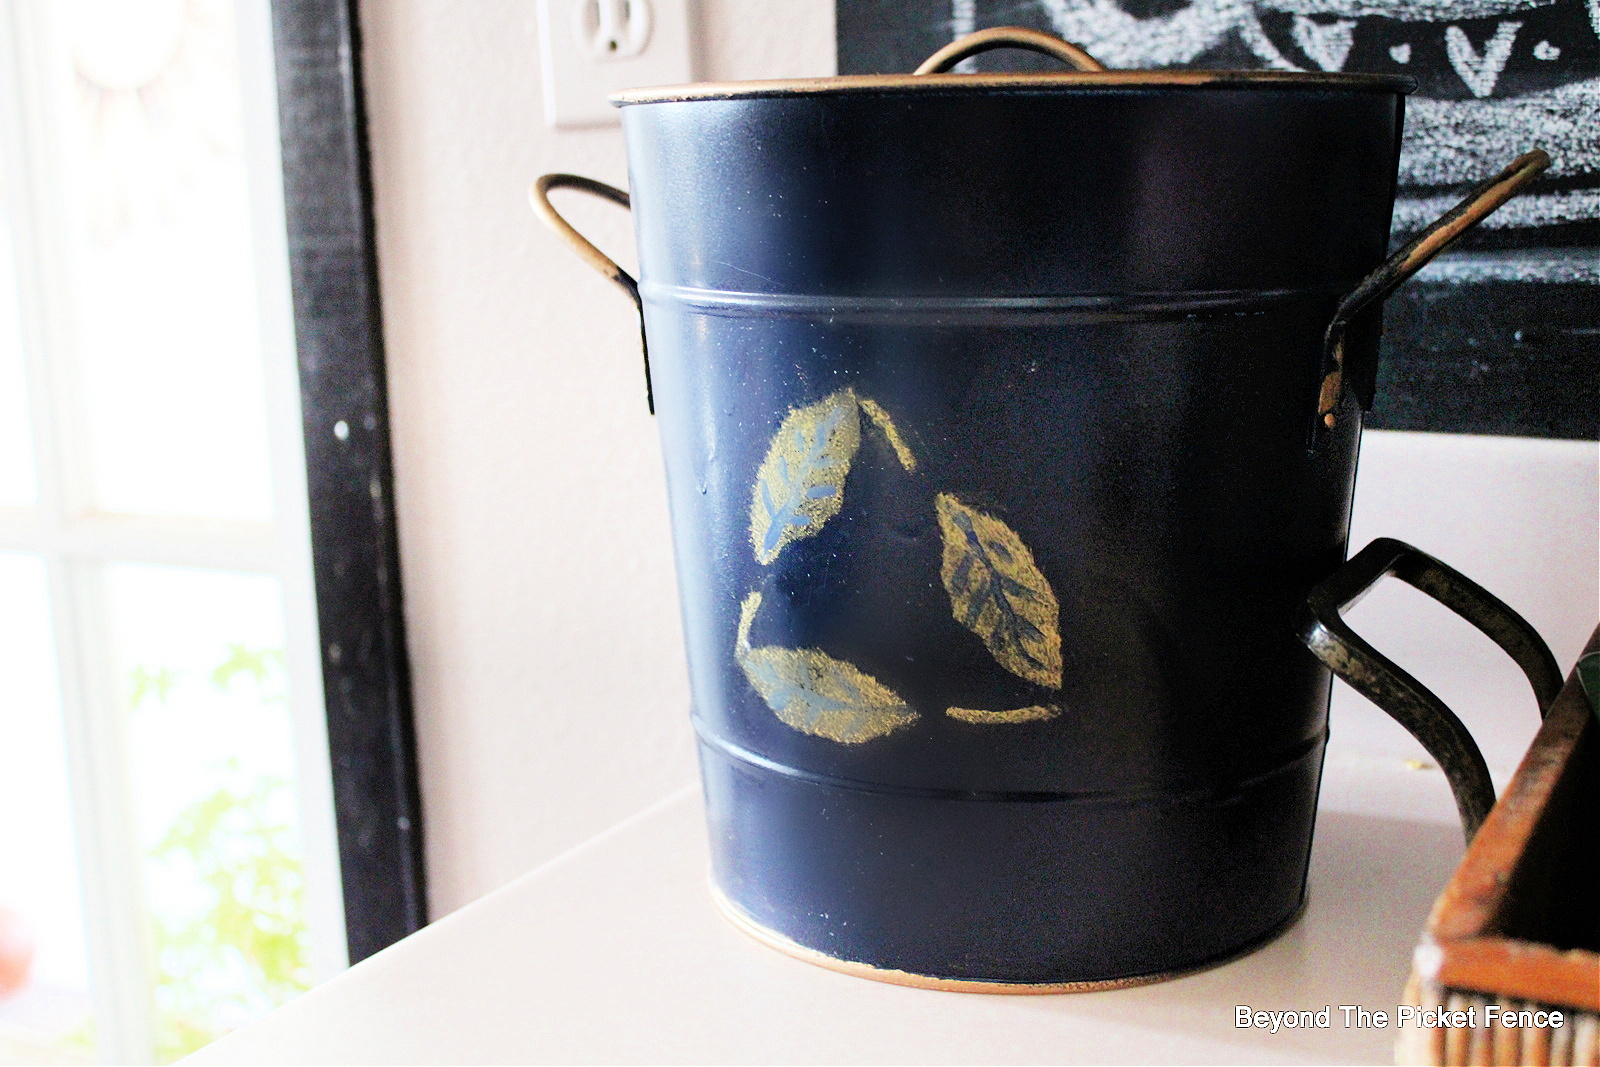
The $2 white ice bucket was a little too farmhouse fresh for my taste and kitchen, so I spray painted it blue and added gold on the handles and rims.
Cute Compost Can
Rather than writing the word compost on the can, I decided to stencil three leaves in a triangular shape which is one of the recognized compost symbols.  I use chalk to mark three triangle points.
Cute Compost Can
I used a random leaf stencil I had (I taped off the leaves I didn't want) and stenciled three leaves with gold paint. I added leaf veins with a small brush.
Cute Compost Can
The lid and the plastic interior makes this a much better compost container option. From the kitchen counter container, the scraps get dumped in a few buckets on the back porch and then we walk them out to the compost tumbler that sits by the green house. 
Cute Compost Can
Reduce, reuse, recycle! This project does that by not only holding compost, but because it is an upcycled thrift store find--something else saved from the landfill. 

Tuesday, January 31, 2023

DIY Chunky Golden Hearts

Enjoy the process--wise and true words. Creating, crafting is and should be just as much about the process as it is about the outcome. Play is important for adults too. So, while I had no idea how this Valentine's Day project would turn out and while it looks completely different than what I was planning, I had fun making it and I like what I came up with to add a golden touch of love to my winter centerpiece.
DIY Chunky Golden Hearts
I wanted to make a few, chunky, wood looking hearts to place in the winter centerpiece. I wanted to use what I had and decided to make a DIY air dry type of clay. The clay was the perfect medium for this project. I wanted the hearts to be chunky and irregular with lots of texture. I definitely achieved that look with the homemade air dry clay. What I didn't get was the look of wood that I was after.
DIY Chunky Golden Hearts
First, let me share how to make the clay. Combine 1 cup baking soda and 1/2 cup cornstarch in a small saucepan. Add 3/4 of a cup of water and turn heat on to medium low. Stir constantly until a ball of dough forms. Remove from heat and kneed until cool on a surface floured with cornstarch. At this point, shape, roll, form dough into whatever shape you'd like. 
(This post contains affiliate links for your convenience at NO EXTRA COST to you.)
DIY Chunky Golden Hearts
Okay, so this is the point where my chunky hearts went astray. I decided I need to add some texture to them. I should have donned my old lady reader glasses so I could better see what I was doing, especially in the white clay. I decided to use my faux wood graining tools (BUY HERE), but didn't clearly see just how well they were working and how much texture they were adding. In retrospect, I think using a toothpick to add some wood grain and lines would have been better. I did push divots and lumps into the hearts.
DIY Chunky Golden Hearts
I let the clay air dry and it took a couple days. You can dry it in a 175 F oven if you want to speed up the process. So, when I put my readers on and actually saw how textured the clay hearts were, I said, "Hmmm...they don't look like wood, but I think I work with this." I decided to try and make it look like a funky, bronze paperweight. 
DIY Chunky Golden Hearts
I painted the hearts black first,
DIY Chunky Golden Hearts
and then I rubbed Antique Gold Rub-n-Buff all over them (Buy RUB-n-BUFF HERE).
DIY Chunky Golden Hearts
I dabbed some black paint on over the gold to add a little more age and patina. The Rub-n-Buff gives these hearts a great look and feel. They are smooth and feel like real metal.
DIY Chunky Golden Hearts
I made three hearts, each about 3.5"-4" tall and placed them in my winter, kitchen table, centerpiece that I shared HERE.
DIY Chunky Golden Hearts
The chunky, golden hearts add subtle Valentine's Day decor to my home without going overboard. I love that I didn't feel the need to create an entire new Valentine's Day centerpiece--these are the perfect, simple addition to the centerpiece. 
DIY Chunky Golden Hearts
And although they did not come out like I had planned, I enjoyed making them and playing and experimenting. Decor and projects don't need to be serious business--have fun with your home!

Monday, January 30, 2023

Vintage Feedsack Quilted Hearts

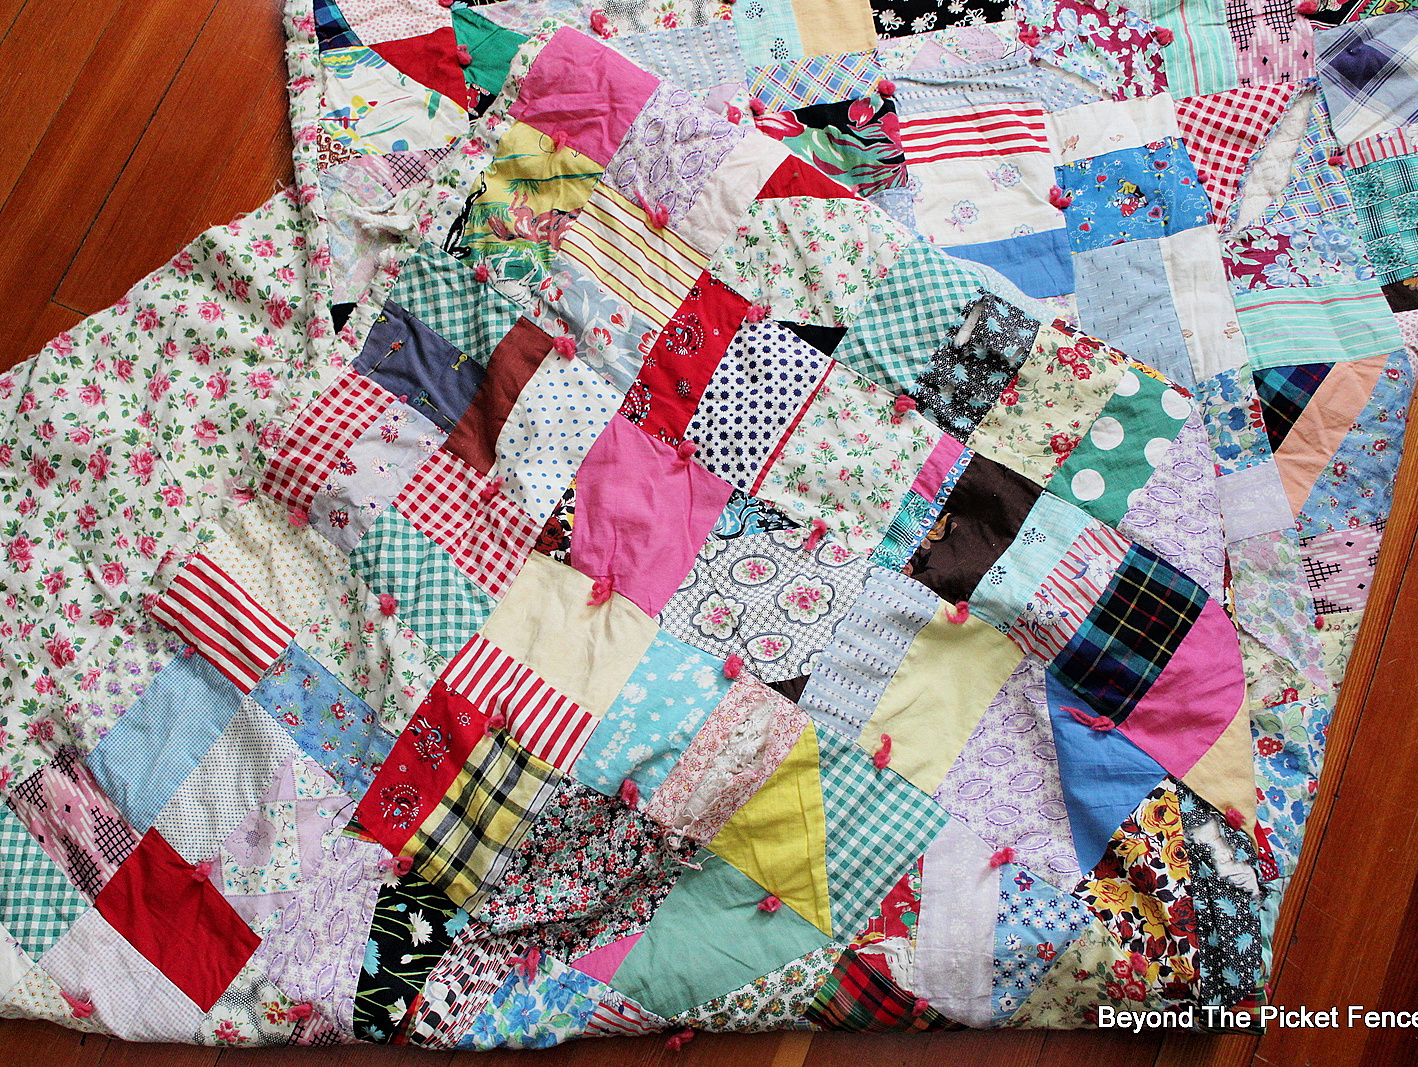
There are items that I buy at the thrift stores that I am not sure what I am going to do with, but just can't pass up. I don't recommend regularly buying items that you don't plan to use, sell, or aren't sure how you will use them as doing so only creates clutter and stuff you have to store. BUT, every now and then, if you recognize the beauty and history in an item and you feel the need to save it, then go for it! Such was the case when I bought this vintage, feedsack (some pieces are feedsack), tattered quilt at the thrift store. 
Vintage Feedsack Quilted Hearts
There are some holes and torn spots and the fabric on this crazy quilt is quite fragile. But, the prints and the colors and the little bits and pieces are beautiful. The problem is, I bought the quilt 18 months ago, washed it, and then folded it and let it sit in my laundry room since purchasing it. Just because something has value, again, we don't need to buy it if all it is going to do is sit around not being enjoyed. SO, I finally decided it was time to cut into this lovely bit of history and make some stuffed hearts for Valentine's Day.
Vintage Feedsack Quilted Hearts
I know, cutting it, eek! Hear me out...It has a lot of holes and tears in it and the fabric is fragile. The quilt has no meaning or history to me. My great grandma didn't make it, I bought it from a thrift store. I do not display or decorate with quilts. It wasn't being enjoyed by anyone sitting in my laundry room. I took me some courage (18 months apparently), but these stuffed hearts are such a sweet way to reuse and repurpose someone's handiwork.
Vintage Feedsack Quilted Hearts
I cut three random shaped hearts, not using a paper pattern, trying to make them somewhat symmetrical, but not worrying if they were perfect.
Vintage Feedsack Quilted Hearts
I sewed around the outside edge, right side out, leaving an unfinished edge on the outside.
Vintage Feedsack Quilted Hearts
I left a small, three inch spot open on the straight part of the heart and stuffed it and then sewed it closed. The first heart I left the original quilt fabric on the back.
Vintage Feedsack Quilted Hearts
While I love this rose fabric, it rips easily so I doubled up (so you couldn't see through it) some muslin for the other two hearts and used that on the back instead. 
Vintage Feedsack Quilted Hearts
I also sewed along the lines of the quilt squares for the the two muslin backed hearts to reinforce the fabric. I love this horse end square. It is the only square of that particular fabric that I see on the whole quilt.
Vintage Feedsack Quilted Hearts
Check out the linens at your local thrift store. You don't have to find a feedsack, vintage quilt, but can use a thrifted quilt that matches your decor--maybe a flannel one or an all white quilt or a satin one. These stuffed quilt hearts are a lovely Valentine's Day decoration. Display them in a wood bowl on an entryway bench.
Vintage Feedsack Quilted Hearts
They also would be cute in a basket, or sitting on a small chair, or propped on a windowsill or bookshelf.
Vintage Feedsack Quilted Hearts
I love these hearts and I appreciate the hard work that went into cutting each small square of salvaged fabric for the original quilt. But, if you follow my blog at all, you probably recognize that the hearts don't fit my home decor or style so I will be selling them, and that is okay too. We can appreciate items and other styles even if we don't decorate with them. I am happy that I gave this old quilt another life and know others will appreciate their history too. Oh, and I have a lot of quilt left to keep creating with. I think a table runner is up next. What would you make?

Friday, January 27, 2023

Thrifting and Happy Memories

There are lots of reasons I love thrifting--the bargains, finding unique items for the home, reusing and repurposing items rather than buying new, keeping things out of the landfill, and the memories that a vintage find might evoke.
Thrifting and Happy Memories
When I spied this vintage, 1970's Wheaton glass popcorn bowl with four serving bowls at a local thrift store, I smiled as I instantly knew it was from the seventies. The popcorn bowl set was in great shape--no chips or cracks and the price was right ($10 for the five piece set) so I knew it had found a new home. 
Thrifting and Happy Memories
Growing up in the seventies, Friday nights were for watching The Partridge Family followed by the Brady Bunch. We also had Nanny and the Professor, That Girl, and Love American Style. Later in the seventies we watched MASH, Rockford Files, and Chico and the Man. Friday night's were for TV and popcorn. Mom would make different types of popcorn--Jello popcorn balls, candied popcorn, cinnamon and sugar popcorn, and buttered popcorn. We would also get a Pop Shoppe pop on Friday Night's to sip on while we ate our popcorn. I loved the grape soda pop. 
Thrifting and Happy Memories
And while we didn't have this particular popcorn bowl, seeing it and knowing it is from the seventies reminded me of those family Friday nights fifty years ago. I love the serving bowls--so much smaller than what we consider a serving today, although I must admit I don't stop at just one bowl full. 
Thrifting and Happy Memories
While we may watch TV differently these days (streaming as opposed to rabbit ears), a bowl full of warm popcorn and a "pop" are still a perfect way to spend a Friday evening at home.

Thursday, January 26, 2023

A Little Round Stool Makeover

When I find a little, solid, wood stool like this for $2 at the thrift store, that is an absolute "yes, I will buy that" moment.
A Little Round Stool Makeover
45 minutes, a little paint, and new fabric for the top and it the small, round footstool is ready for a new life.
A Little Round Stool Makeover
I Unscrewed the extra wood top that was for the cushion and then I removed an extra, round, foam cushion and a black cover with elastic around the edge first.  This was under that--it had obviously been well used. I imagine someone's feet resting right there in the middle.
A Little Round Stool Makeover
I gave the wood legs and edge a rough sanding, just enough to get the gloss off so paint would stick. I then painted the wood stool black.
A Little Round Stool Makeover
I threw away the original foam cushion, but kept the second one that had been added. Using a piece of sherpa fabric, I staple gunned the fabric on the wood round that was screwed to the stool.
A Little Round Stool Makeover
I then I screwed the top back to the stool base. 
A Little Round Stool Makeover
A little fabric covered stool lie this is a perfect place to rest feet when sitting at a rocking chair or a smaller sized side chair.
A Little Round Stool Makeover
I can picture my almost two-year-old grandson using the stool for a book and snack spot or as place to sit as it is the perfect height for a wee one.
A Little Round Stool Makeover
Because my sweet grandbaby doesn't live here and I don't have a place Where i need a little stool right now, I will be selling this one. It was a quick and easy flip and the price was right. I am always amazed how a little paint and new fabric can update even the simplest items.

Wednesday, January 25, 2023

An Old School Clock for my Old Schoolhouse Home

I think most of you know I live in an old, two room schoolhouse. It was built in 1931 and was used as a school until the mid seventies. It was then used as for community meetings for 4-H and other activities. In the early nineties it went up for auction and a couple bought it and made it into a home. We bought it from them in 2015. We appreciate the hard work the previous owners did to make an empty school into a home. We do wish they would have preserved more of the original items and features of the schoolhouse. And while I don't decorate with a theme (my theme is eclectic), I do have this one small area at the end of my kitchen that has all of the schoolhouse vibes happening.
An Old School Clock for my Old Schoolhouse Home
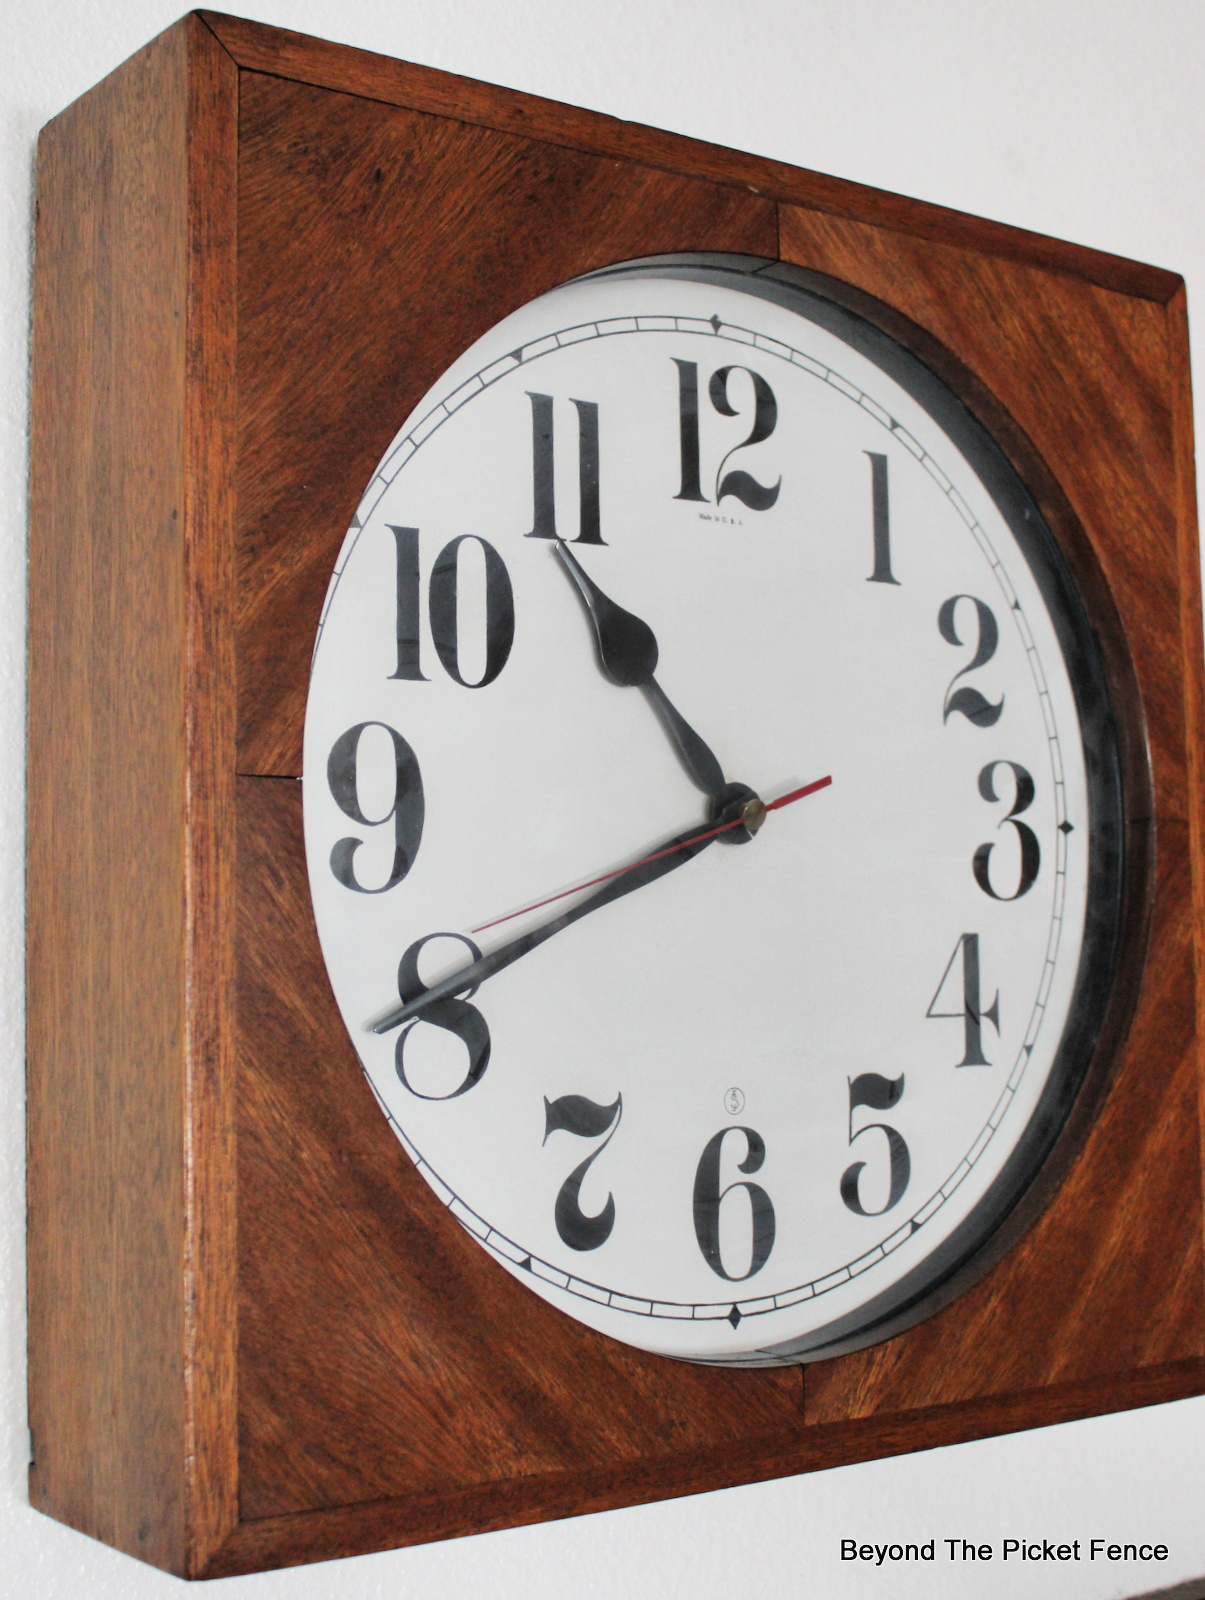
I was just able to make this spot more schollhousey (I'm sure that should be a word) with the addition of this incredible, vintage, oak clock that I found at a thrift store. We chose to hang the clock above this kitchen door that leads to the mudroom and laundry room because it is a great place to see it and because that is where school clocks are typically hung, above a doorway. 
An Old School Clock for my Old Schoolhouse Home
Yes, finds like this are why I continue to thrift. I rarely look at the clock/electronic area at the thrift store, but just happened to because I need a new cheap clock in my workshop. This was up on a shelf and looked like a wood box. When I saw this beautiful antique wood I knew the clock needed further investigation. 
An Old School Clock for my Old Schoolhouse Home
When I spied the $7.99 pricetag, I decided I didn't care if the clock worked or not, it was a keeper. In the picture above of the side you can see a little hole. I think this was a corded, electric clock that someone updated into a battery operated clock. A fresh battery and it keeps time like a charm. It has this stamp on it above the 6. I cannot find this particular stamp online so if anyone has any info on it, I would love it.
An Old School Clock for my Old Schoolhouse Home
There are antique clocks I can find online that are almost identical, except they are stamped with the name Seth Thomas. There was a company called Smith Electric company that made school clocks, but I don't know what the J in the stamp is for. There are also antique clocks made by Smith Enfield. I think I should have been an archeologist or a historian as I love researching the vintage and antique items I find.

I gave the gorgeous oak case on my new to me clock a refresh with Wise Owl Furniture Salve (GET it HERE).
An Old School Clock for my Old Schoolhouse Home
Other school related aspects of this little corner include the chalkboard that is from the school. The little chairs, and old wood chalk box and red chalk box fit the theme. The roundback spindle chair was used in the kindergarten classroom in the Catholic school where I first taught. They were no longer used and shoved in storage and one of the nuns told me I could have it. The exposed brick is now the chimney for our woodstove. it was the chimney for the original coal boiler that was in the basement. This new addition to our schoolhouse home makes my heart happy. Keep on thrifting on, friends!
An Old School Clock for my Old Schoolhouse Home

Monday, January 23, 2023

Fresh Herbs in a Winter Kitchen Centerpiece

I don't know about you, but this time of year I sure do crave fresh--fresh plants, colors, decor, etc. I love using fresh herbs in the kitchen and do always have a planter full of them outside the back door in the summer. I was going to repot them inside, but they succumbed to an early, frost that wasn't forecasted. Thankfully, there are fresh, potted herbs occasionally in the produce department and I decided it was time to buy them to add to my kitchen counter space.

Fresh Herbs in the Winter
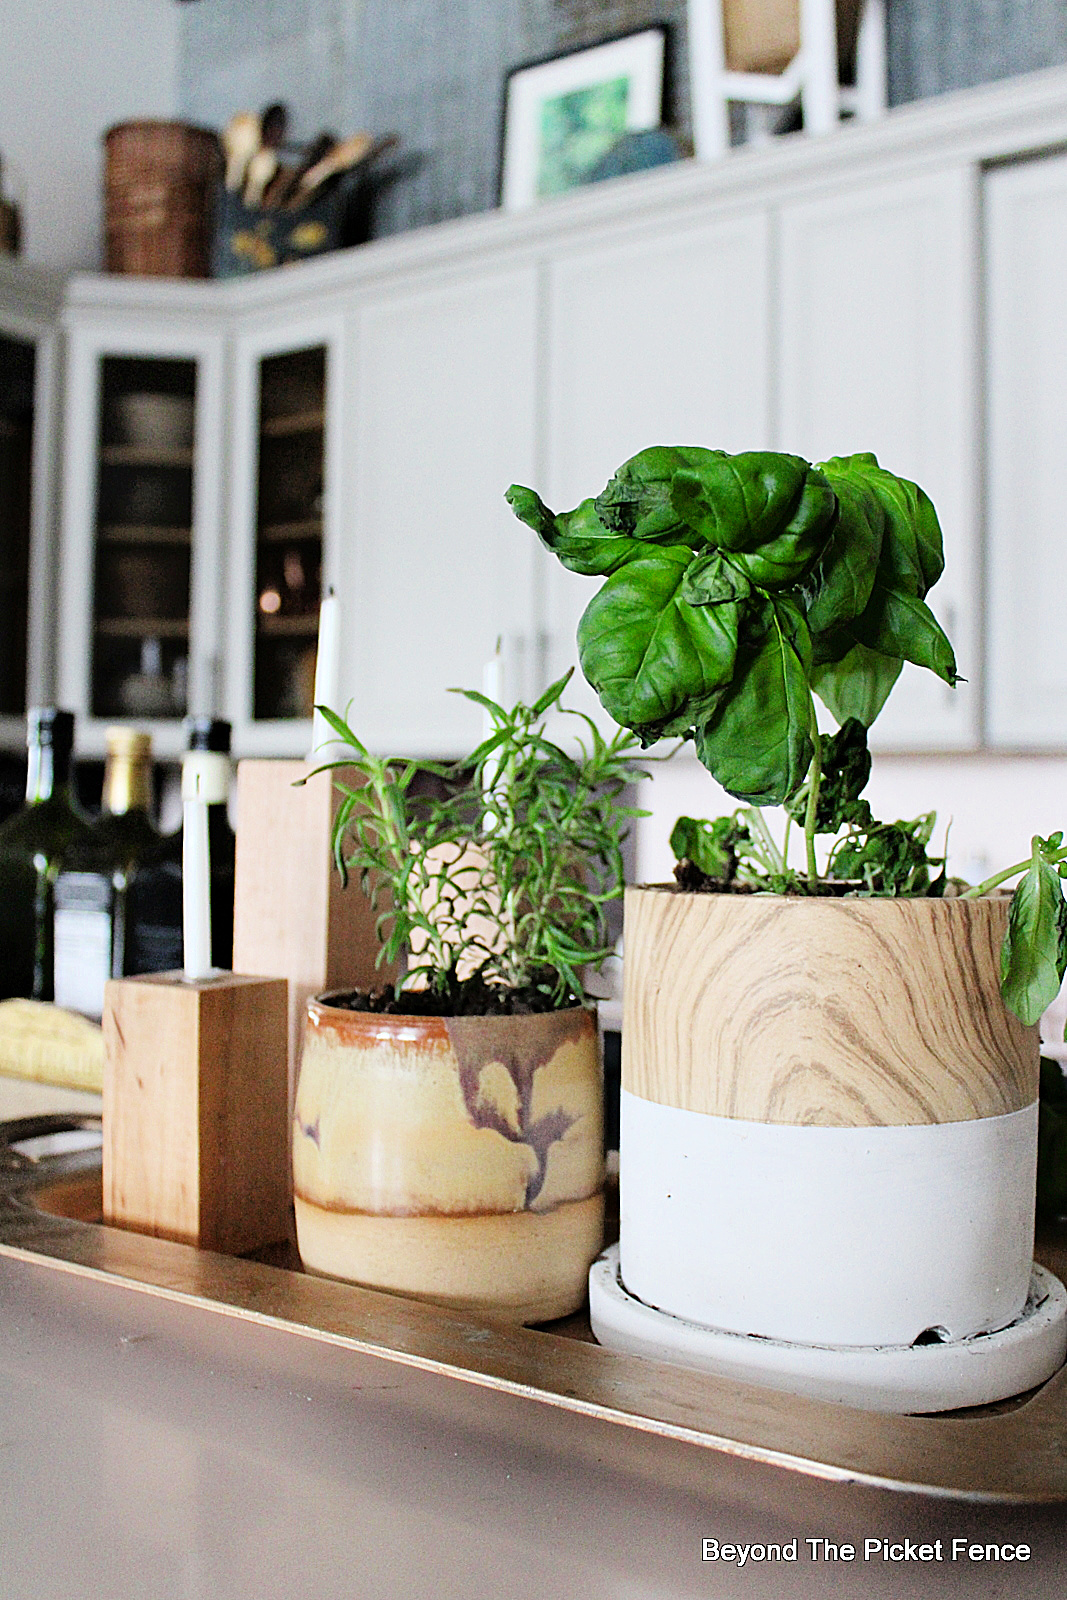
The store had rosemary, basil, and mint. I chose the rosemary and basil (which got a wee bit wilted in my cold car). 
Fresh Herbs in the Winter
I planted them in a couple of my planters that have a nice organic texture and feel to them.
Fresh Herbs in the Winter
The potted herbs are sitting on a thrift store tray. It was a silver colored metal tray that I rubbed Antique Gold Rub-n-Buff on. The tray has an engraved leaf pattern on it. This tray sits on my upper counter that is six inches above my stove, which will be convenient when cooking.
Fresh Herbs in the Winter
This tray held all of the modern candlesticks I made in November (SEE HERE). I left three of them as they balance at the planted herbs on the tray and add a warm, natural or organic texture. 
Fresh Herbs in the Winter
The herbs give off a subtle, lovely smell and I love the fresh life they bring to the space. I will use the rosemary on chicken or with roasted vegetables. The basil is perfect for caprese or spaghetti or pizza sauce or in chicken alfredo.
Fresh Herbs in the Winter
While I have living plants throughout my home, having fresh herbs in the kitchen gives me a hint at the hope of the coming spring and is good for my soul. Look for potted herbs in your local grocery store produce section, plant them, and group them together in your kitchen to add life, green, nature, and a fresh smell to your space.