Tuesday, April 28, 2020

DIY Wood Corbels

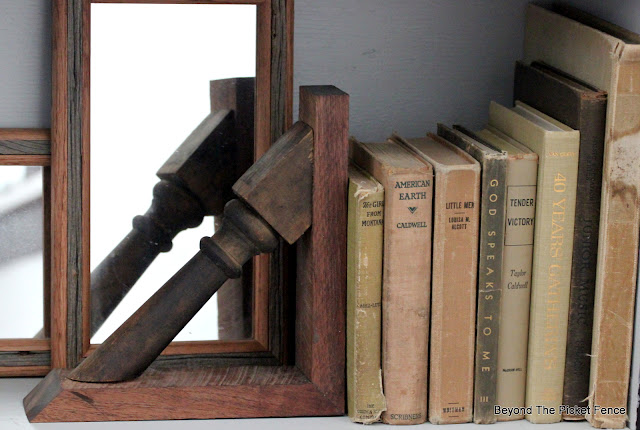
Wood corbels are hard to come by and when you do find them, they aren't cheap. So, I decided to make some.

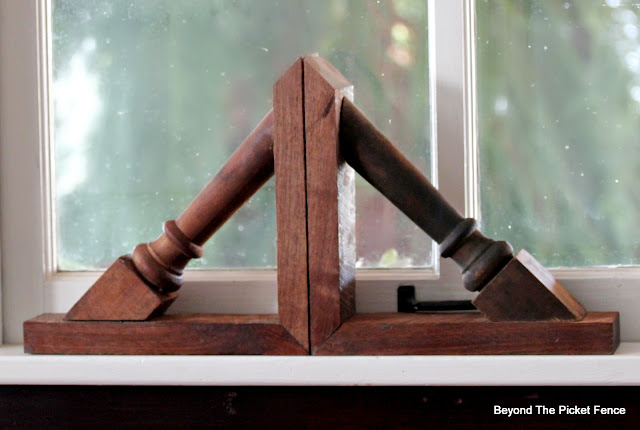
I used two wood spindles I had, cutting 45 degree angles on them. I used some nice hardwood ( I am not sure what variety of wood it is) to create the 90 degree supports and joined them together with screws.
DIY Wood Corbels
They make great bookends.
DIY Wood Corbels
Or are cute sitting in a windowsill.
DIY Wood Corbels
They are fun sitting on a table and 
DIY Wood Corbels
are good props for favorite photos.

They also can be used in doorway openings or as shelf or mantle brackets. I will definitely be making more of these. Where would you use them?

Sunday, April 26, 2020

Sunday Verses

Inspiring Devotion on Endurance
Happy Sunday! We have been walking along the river lately and we always enjoy catching glimpses of beavers hard at work in the river. The size of some of the trees that they have chewed down amaze me. They work at gnawing around the trunks so that they can then get to the branches to drag back to build their dens. The beavers seem to constantly be on the move, not giving up on the tasks in front of them. We have things in our lives that take time-- healing relationships, getting through hardships, forgiveness, change, and sometimes (often times) we want to quit in the waiting. When we persist and endure, our faith is strengthened. We rest in knowing that joy waits for us and that some day we will be made whole with Jesus. God's grace grants us endurance for this turbulent and trying life journey--keep working to hold on to hope, to love, to Jesus.

Sunday, April 19, 2020

Sunday Verses

Let God Fix the Problems
Happy Sunday! On a recent hike we came across this fence post that someone had tried several times to fix. It obviously hadn't worked as the fence rail was lying on the ground next to the post. How many times have we tried to fix things in our lives and they just don't quite work out the way we plan? When we try to repair our splintered lives alone the mends often don't hold. When we give our problems to God and let him work them out, let him rebuild and correct and improve them, the resolutions are good and right and lasting. Let the nails that Jesus endured for you be the fix that soothes and heals the broken places.

Thursday, April 16, 2020

Upcycled Drawer Work Station


I have a hard time saying no when someone wants to give me something. So, when an acquaintance asked if I wanted an old, blonde, dresser with a mirror I said yes. This thing was beastly heavy, but I thought I might use it as a vanity in my bathroom. However, it sat and I decided to go a different route for a vanity. During a purge I decided to save the drawers and dump the rest. 
Upcycled Drawer Work Station

I repurposed two of the larger drawers to make a work station.Upcycled Drawer Work Station

I have made these before, but I am always happy with the results and pleased with how versatile these are.
Upcycled Drawer Work Station
I painted the drawers red, yellow, green, and aqua. I sanded them a bit. After painting I added legs--1" x 4"s. I made a top from pallet wood, cutting the curve with a jigsaw and then attached it with hinges. I stained all of it and finished it with a clear coat.
Upcycled Drawer Work Station
This makes a fun bar station--storage for towels, glasses, wine bottle openers, etc. inside the top drawer. 
Upcycled Drawer Work Station
The bottom drawer is perfect for bottles, an ice bucket when not in use.
Upcycled Drawer Work Station
These upcycled drawers make a great office work station. I made it counter height and it is a perfect place to stand and work (or sit on a stool).
Upcycled Drawer Work Station
Books, files can be kept in the bottom drawer and office supplies in the top drawer.
Use it in an entryway or mudroom. 
Upcycled Drawer Work Station
Boots and shoes in the bottom, 
Upcycled Drawer Work Station
mittens and scarves in the top drawer and keep mail and keys on the top.
Upcycled Drawer Work Station
This piece would work great in a kitchen--keep a mixer, pressure cooker, air fryer, blender in the bottom. Store towels, cookbooks, extra serving bowls in the top. 

Or how about utilizing the work station for crafts--fabric, supplies in the top, sewing machine, etc. in the bottom with a perfect place to craft on the tabletop.

What ideas do you have for a piece like this?

Tuesday, April 14, 2020

Create Farmhouse Canisters


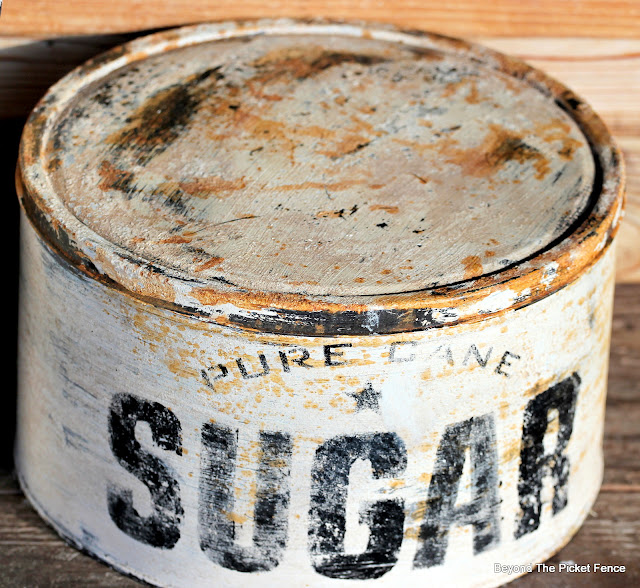
I cannot quit throwing things in the fire to rust and age them. It really is quite therapeutic, tossing things that others have discarded into the flames, never knowing how they will come out. My latest fire transformations started life as a popcorn tin and a large butter cookie tin.

I little fire, paint, hydrogen peroxide, salt, and stencils and have a pair of perfect farmhouse food canisters.
Create Farmhouse Canisters
The sugar tin sat for awhile, rusting, so it is extra aged.
DIY Rusted Farmhouse Canisters
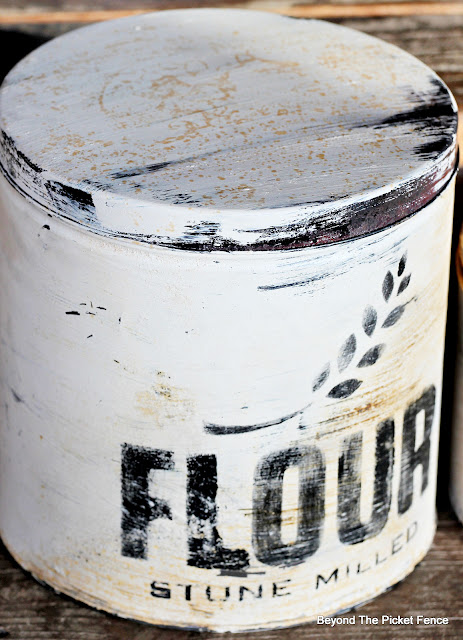
I rusted the flour tin for less than 15 minutes, so it is not as rusty, crusty. I think it makes the pair look more authentically old to have them a bit different.
DIY Rusted Farmhouse Canisters
After I pull the tins from the fire (I keep them in the fire for a few hours), I wipe the soot off and paint them with whatever I can find--typically interior latex, not fully covering the tins.
When the paint is dry, I might sand some off and then I pour hydrogen peroxide on the tin while it rests on a bucket and sprinkle salt. I let that sit for 10 minutes-10 days, depending on what is happening in my life. I brush off the dried salt and clear coat the tins with spray.
DIY Rusted Farmhouse Canisters
(For your convenience, this post contains affiliate links. What does that mean? If you chose to purchase something through my link, I may receive a small compensation, BUT it cost you nothing extra 😉. ALSO, please note, prices for stencils that you see are in Canadian and convert to less in US dollars.)
DIY Rusted Farmhouse Canisters
Using the flour and sugar stencils from Funky Junk's Old Sign Stencils (Get them HERE), I stencil the tins with black paint. Taping the stencils on makes it much easier to stencil on a curved surface.
DIY Rusted Farmhouse Canisters
I sand a little of the black paint off and then finish with another clear coat. I also clear coat the inside so that anything that gets stored in them stays clean.

I love their vintage farmhouse feel!

Sunday, April 12, 2020

Sunday Verses

Devotional on God's Saving Grace
Happy Sunday and Happy Easter! There sure are a lot of "normal" things that seem to be taking extra effort these days--showering, laundry, being patient, making pretzel jello (a family favorite) for Easter dinner. Sometimes we just have to do the hard things even when we don't want to and when we do, we are "rewarded" by our efforts. But today, Easter, is a perfect day to be reminded that with God we do not have to do any extra work to earn his love and salvation--they are both gifts that Jesus bought with his death on the cross. There is nothing you can do to make God love you more. You do not have to perform or achieve anything to attain God's redemption. You simply need to believe that Jesus died for you. He died and was resurrected on the third day so that we may have the freedom to enjoy his saving grace and unconditional love. No extra effort on our part is required. Thank you, Jesus!
Friday, April 10, 2020

Feed Sack Pillows


Nothing screams farmhouse more than feed sacks. The problem is, everyone knows this so they are becoming hard to find and when you can get them, they are pricey. This is why I love Funky Junk's Old Sign Stencils Grain Sack line--you can make your own!

Feed Sack Pillows
(For your convenience, this post contains affiliate links. What does that mean? If you chose to purchase something through my link, I may receive a small compensation, BUT it cost you nothing extra 😉. ALSO, please note, prices for stencils that you see are in Canadian and convert to less in US dollars.)
Feed Sack Pillows
Using the flour sack stencil, the grain sack stencil, and one of the fabulous grain stripe stencils and made my own feed sacks that became pillows.
Feed Sack Pillows
I used some fabric paint to stencil. I created the flour sack on some nubby muslin, stenciling the flour design first in grey and then the strip in white.
Feed Sack Pillows
Pillow ticking seemed perfect for the grain sack pillow.
Feed Sack Pillows
I typically make pillows as a pillow cover because I know that I like to be able to wash my pillows. To do this I cut the front piece 16" x 16" and the back piece 16" x 24". I then cut the back piece in half and turn and sew one raw edge on each piece. I overlap these when I place the front and back pieces right side ends. Sew around the outside edges of the pillow and flip and iron and then add a 16" pillow form.
Feed Sack Pillows
The grain stack stencils are probably my favorite stencils from Old Sign Stencils. They are perfect to make feed sacks, but also great on crates, buckets and tins, and they make the cutest signs. See how else I have used them HERE, HERE, and HERE

Sunday, April 5, 2020

Sunday Verses

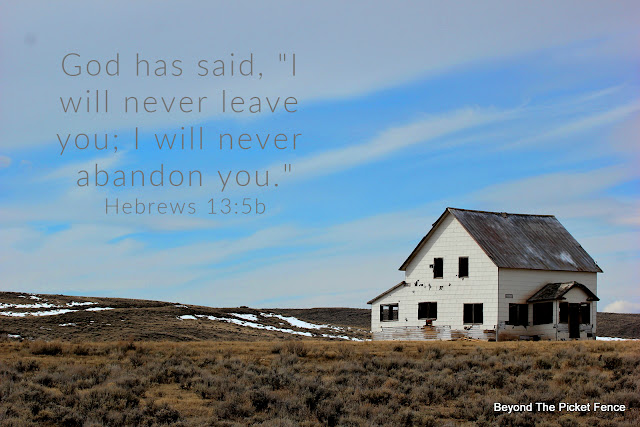
God Has Not Abandoned Us
Happy Sunday! Another drive to get out of the house led us past this abandoned house sitting in the middle of a Montana prairie. I wondered why it had been left alone and neglected, who had lived in it, why was it deserted?  Abandoned--a lot of us feel like this right now. We are stranded from our jobs, alone and distant from family and friends, unsure of what our government is doing, and wondering where God is. First, let me assure you, it is okay to question God, to ask him why we are going through this. He can handle our questions and feelings of doubt. But, even in the uncertainty, this I know--God is nearby, he is close to us, he has not abandoned us. He may be allowing darkness to run its course right now, but he is holding us through it all. We will ultimately see his goodness in these trials. Rather than feeling stranded and neglected, let's abandon our fears and trust that we are not alone in this time. This week ask God to feel his nearness, to know without any doubt that he is close-by and that he has not deserted us.

Friday, April 3, 2020

Rustic Farm Supply


This is a 15 minute project that adds a great, rustic, down home touch.
Rustic Farm Supply Sign
I love stencils because they are so easy and quick to use. They can be used in a variety of ways and on so many different surfaces and projects.

(For your convenience, this post contains affiliate links. What does that mean? If you chose to purchase something through my link, I may receive a small compensation, BUT it cost you nothing extra 😉. ALSO, please note, prices for stencils that you see are in Canadian and convert to less in US dollars.)
Stencil a Rustic Farm Supply Sign
This FARM SUPPLY stencil from Old Sign Stencils is new to me and perfect for Montana. You can get it HERE!
The extra details like the little shovel and grain makes these stencils unique.
Stencil a Rustic Farm Supply Sign
I stenciled it on an old piece of barn wood, using white paint. I sanded a little bit of it off to make it look weathered. I like it hanging above the doors to my John Deere green carriage house.
Stencil a Rustic Farm Supply Sign
What have you stenciled?

Wednesday, April 1, 2020

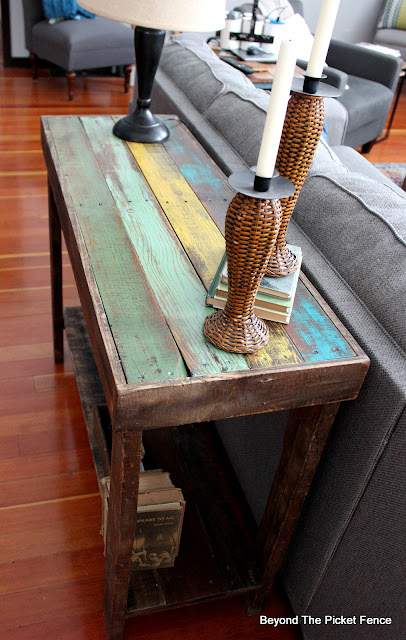
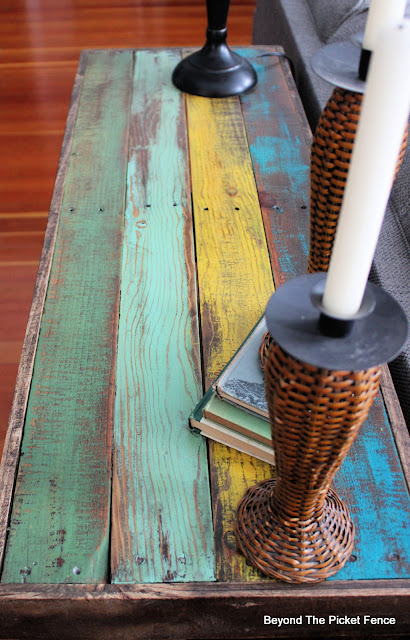
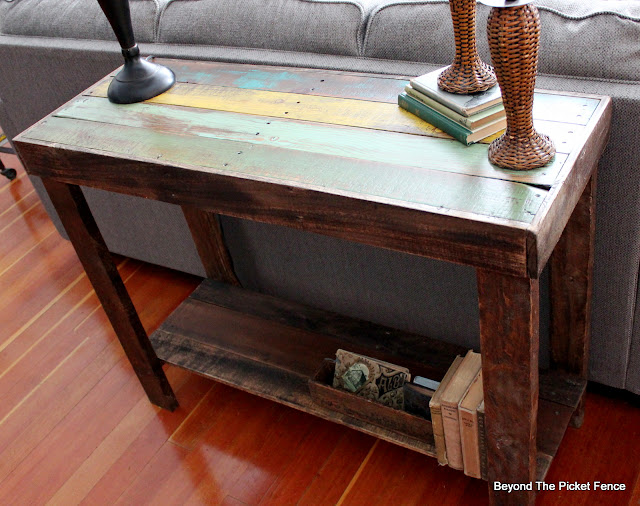
Colorful Rustic Table


I have decided during this shelter at home I am building whatever I FEEL like building, not worrying about piece of furniture might sell best or what I need for my booth. I have also approached this time in the workshop as a free-for-all--no plans, just let the material I have inspire me. So when I found four thicker 42" long pallet boards that were in good shape, i decided to make a table.
Build a Colorful Rustic Table From Pallet Wood
I found four pallet 2" x 4"s or runner boards to use as legs. I cut these 31" tall. I added a 12" brace across from a pallet 2" x 4" at the bottom, using two same sized boards to hold it up. This is an easy way to hold a brace in place and make sure they are at the same height. i screwed through the outside of the legs to secure the bottom brace.
Build a Colorful Rustic Table From Pallet Wood
I added a 1" x 4" board across the tops of the legs. The legs are approximately 14 1/2" apart on the outside. I made two sets of legs. FYI , these are the same shape I built for the jelly cupboard I made HERE.
Build a Colorful Rustic Table From Pallet Wood
I painted the boards for the table top and when they were dry, I turned them upside down on my workbench. I secured the leg pieces to the top, screwing through the board at the top of the legs. I also added a board across the middle of the underside of the table. 
Build a Colorful Rustic Table From Pallet Wood
I used pallet boards for the outside edges or apron of the table top, securing it with the nail gun.
Build a Colorful Rustic Table From Pallet Wood
Pallet boards across the bottom, screwed into the braces created a bottom shelf and makes this table more sturdy.
Build a Colorful Rustic Table From Pallet Wood
I stained everything with Early American stain by Minwax and finished with clear coat.
Build a Colorful Rustic Table From Pallet Wood
I love this size table for a sofa table. But, it also makes a great entry table or a console table for a flat screen TV. 

For more detailed instructions on building with pallets, check out my pallet books on Amazon-- Crafting with Wood Pallets or Wood Pallet Wonders by Becky Lamb.