Thursday, November 17, 2022

Thrifty Thursday Beaded Garland That You Can Personalize

Thrifty Thursday Beaded Garland That You Can Personalize
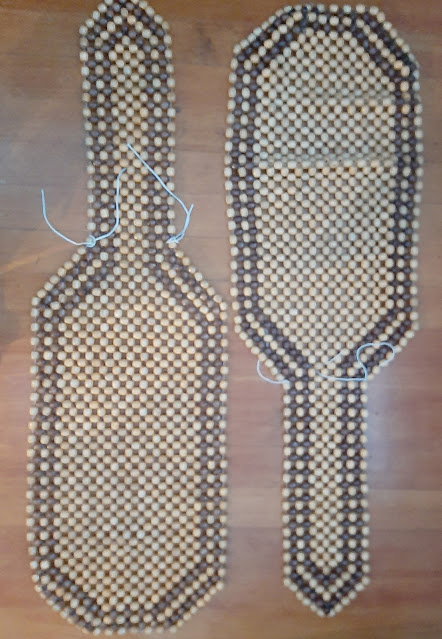
I have shared this thrifting hint before, but since I just found two more, I am back to tell you to ALWAYS look for beaded seat covers at the thrift store. I recently found two that I paid $3 each for. I spent a little more than an hour cutting the seat covers apart and ended up with three gallon bags full of wood beads.
Thrifty Thursday Beaded Garland That You Can Personalize
There are so many different things you can create with wood beads. The first project I used these natural wood beads for was to create a garland.
Thrifty Thursday Beaded Garland That You Can Personalize
Keep reading to see how I created this and how you can make a wood bead garland that you can individualize for your decor and for the seasons.
Thrifty Thursday Beaded Garland That You Can Personalize
First off, if you don't have a wood beaded seat cover, you can buy wood beads. Just know that buying them new will be more expensive. You can also purchase wood bead garlands already strung. I used almost 40 beads to make this garland.

You need something to string your garland on. You want something that is similar in color to your beads. I used jute or twine for this garland. Wire works well too, although it doesn't drape as well, but does wrap nicely around a tree. You don't want to make one single garland too long. This one is 13-14 feet long and I would not want it any longer than that. 
Thrifty Thursday Beaded Garland That You Can Personalize
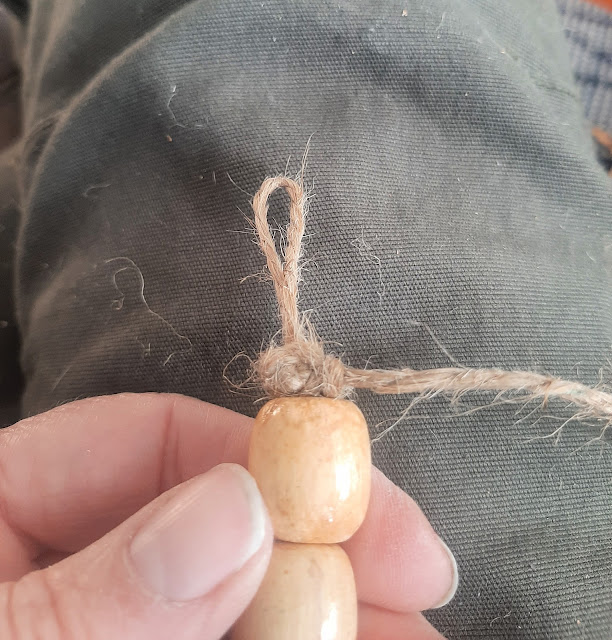
Tie a loop knot on the end and start stringing.
Thrifty Thursday Beaded Garland That You Can Personalize
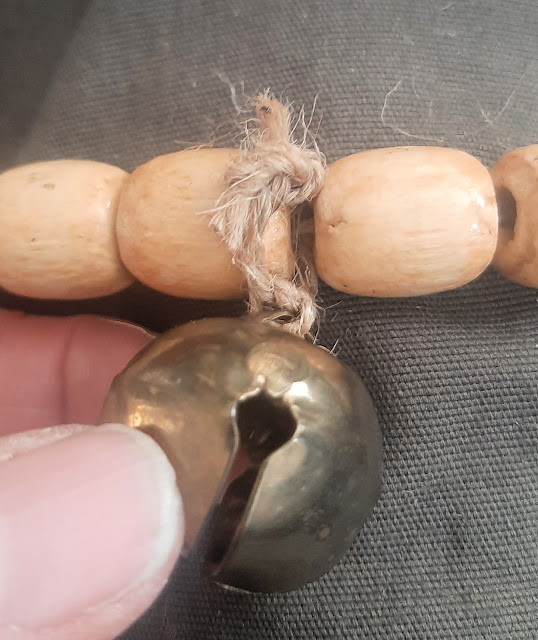
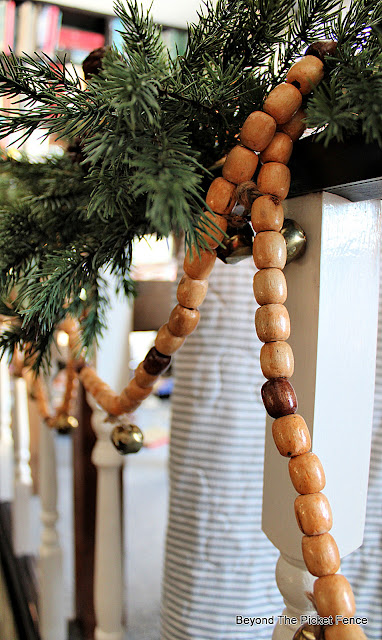
I strung 10 light colored wood beads and then one dark colored bead. It took me about half of one Hallmark Christmas movie to string the garland (i.e. one hour). Now comes the personalizing part. I chose to add some large, brass, jingle bells that came off of a $2 thrift store bell wreath. I tied a piece of jute on the bells and then tied this in the middle of the ten lighter colored beads. I tied it loosely so that I will be able to easily cut the bells off after Christmas and use the wood bead garland year round. 
Thrifty Thursday Beaded Garland That You Can Personalize
Other ideas for things that you could hang from the bead garland include: ornaments, faux berries or mistletoe sprigs, wood or paper snowflakes, letters to spell something out, small children's books, dried fruit such as orange slices or apple slices. For other times of the year you can hang wood hearts, shamrocks, dried flowers, etc. 
Thrifty Thursday Beaded Garland That You Can Personalize
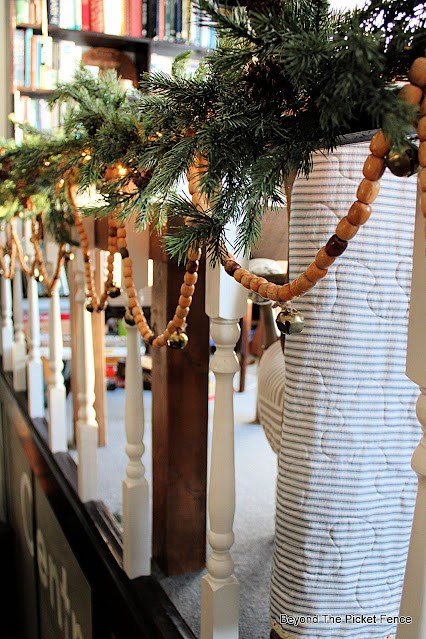
This year I am replacing most of the white decor that I have used for Christmas that past few years with browns and more organic textures--wood, leather, rattan. I draped this first garland I made between the railing spindles of my loft library. The faux pine garland and lights are held to the railing with black zip ties. I was able to use the pine branches to hold and drape the wood bead garland.
Thrifty Thursday Beaded Garland That You Can Personalize
I love the cozy and homey feel of layering decor. A green pine garland, a bead garland with bells, lights--all add an eclectic and warm touch to holiday decor. This garland will look wonderful on a tree or draped on bare branches. Use it in an entry draped on coat hooks or wrap it around a pine garland hanging over a window or door. It cost me about $2.50 to create and I used less than a quarter of the beads I cut off of the seat covers. I will be string more!


Monday, November 14, 2022

How To Age Shiny Gold Jingle Bells

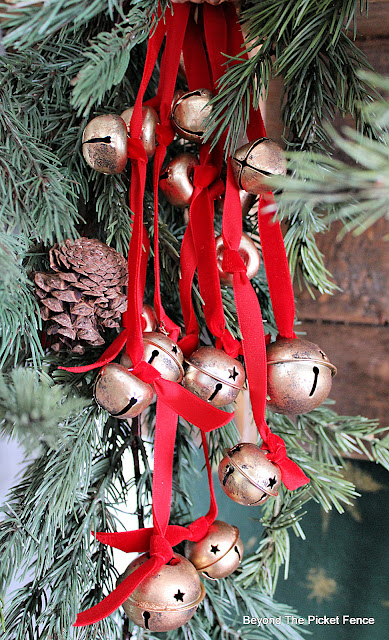
If you saw my post last week (the post below this one) you might have seen the bunch of jingle bells that I hung in the draped part of the pine garland. 
How To Age Shiny Gold Jingle Bells
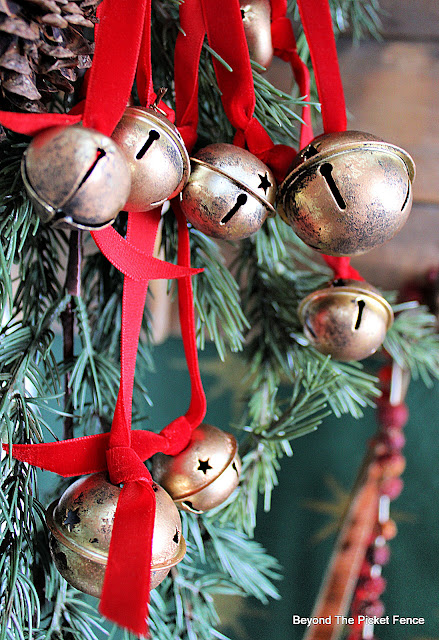
The bells were a bonus item that were part of a sparse garland I bought at the thrift store to take apart and use the individual branches. I removed the bells as well and decided to use them. But, they were much too shiny as they were so I aged them to give the jingle bells a more vintage look.
(This post contains affiliate links at no extra cost to you.)
How To Age Shiny Gold Jingle Bells
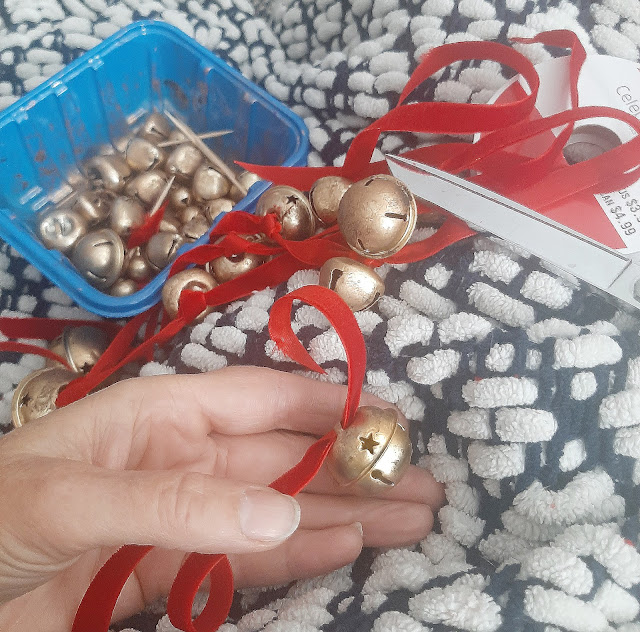
After removing the bells, I put them in a plastic produce container (reduce, reuse, recycle) and dabbed black paint on them with a stiff bristled brush. This may be noisy and may annoy your significant other if you are dabbing the paint in the the vicinity of their football watching 😁
When the black was dry, I then dabbed antique gold rub-n-buff (BUY HERE) in the same manner as the black paint. 
How To Age Shiny Gold Jingle Bells
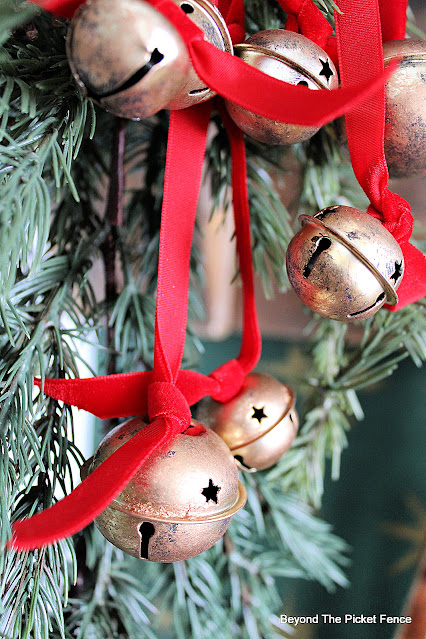
I then cut different lengths (10-15 inches) of red velvet ribbon. Be sure to cut a sharp angle on one end to thread the bells onto the ribbon. I sat under a cozy blanket and threaded the bells onto the ribbons, putting two to four bells on each ribbon. I tied a single knot at each bell. If I did it again, I would make sure that I am placing the bells at different intervals on each ribbon.
How To Age Shiny Gold Jingle Bells
Tie a knot on the end bell and cut the tail the length you like.
How To Age Shiny Gold Jingle Bells
I held up the strings, trying to adjust the bells so they hang at different lengths, and then wrapped 22 gauge wire around the top, using plyers to crimp the wire so that it held well. I trimmed the ribbon ends and then added a wire loop for hanging.
How To Age Shiny Gold Jingle Bells
I simple hung them on a nail from the top shelf and incorporated them into the pine garland.
How To Age Shiny Gold Jingle Bells
It is a large bunch of bells, I liked the fullness of it. A few strands of antiqued jingle bells would look good hanging down into the middle of a wreath. If you have ever priced authentic, vintage sleigh bells, you will know what an inexpensive alternative this is. I love how they really look authentically old.
How To Age Shiny Gold Jingle Bells

Friday, November 11, 2022

Eclectic Rustic Christmas Decor in the Entryway

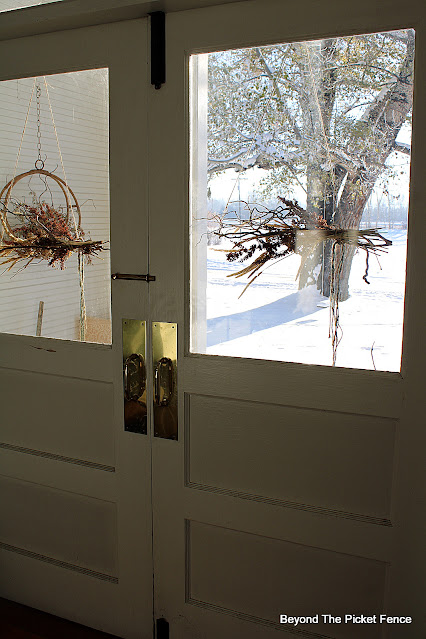
I typically wait until Thanksgiving weekend to decorate for Christmas. But, with ten inches of snow outside and temperatures in the teens, I am ready for Christmas decor now! It is still all fall decor on the front porch, too cold to decorate it right now, but here is a picture of the snow looking through the front doors.
Eclectic Rustic Christmas Decor in the Entryway
For now, I started with decorating my front INSIDE entryway. When I painted and stenciled (HERE) the entryway earlier in the year, I knew it was going to be fun to decorate it for Christmas. A few simple additions and changes from my fall decor, and I have the perfect for me, eclectic, rustic Christmas.
Eclectic Rustic Christmas Decor in the Entryway
I took a lot of pictures because the sun was streaming through the windows beautifully, so be ready for photo overload. Keep reading to see them all.

Thursday, November 10, 2022

Sweet Little DIY House Ornaments

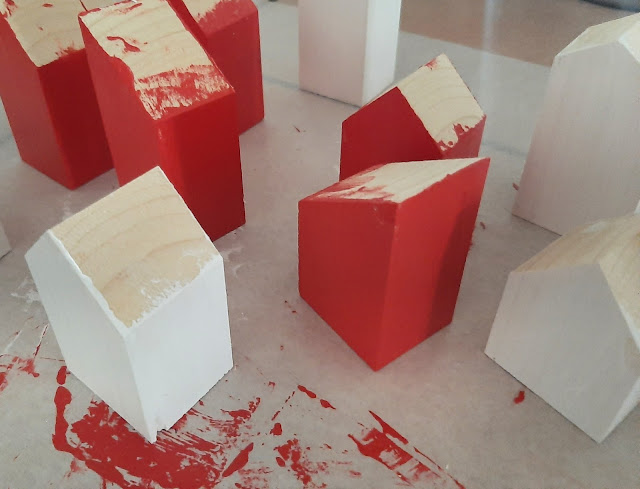
Last year I had fun making little, shelf-sitter houses for the holidays (HERE). This year I decided to smaller house ornaments from a scrap of 2" x 2" pine. Not a woodworker? No worries, keep reading to see how you can create some little home ornaments for yourself. 
Sweet Little DIY House Ornaments
I made a dozen from one stick of 2" x 2". Keep reading to see how easy it is to create this. IF you don't have access to wood and a saw, you can find unfinished wood house at the craft stores for about a dollar each. Or you can find house shaped, wood blocks in the toy section of your local thrift store.
Sweet Little DIY House Ornaments
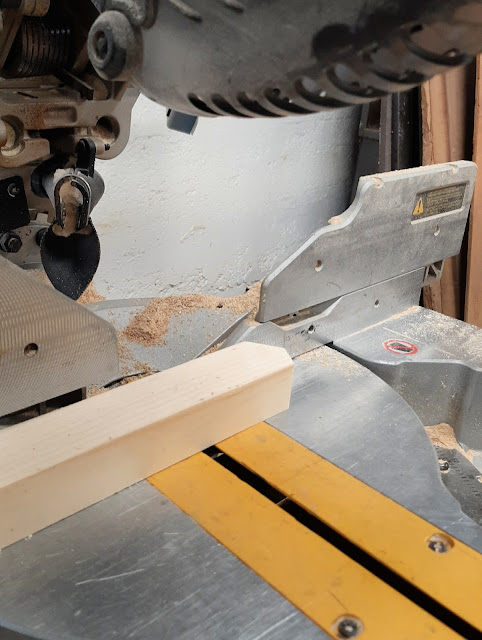
I cut the roofs on these little houses at either a 30 or 45 degree angle. Most got a pointed or peaked roof, but some are amore modern house with an angled roof. I cut the houses different heights, 2-4 inches tall.
Sweet Little DIY House Ornaments
Please remember your safety lessons while using power tools. ALWAYS wear eye protection and ear protection. I also stand to the side the best I can while cutting in case anything flies or kicks back. 
Sweet Little DIY House Ornaments
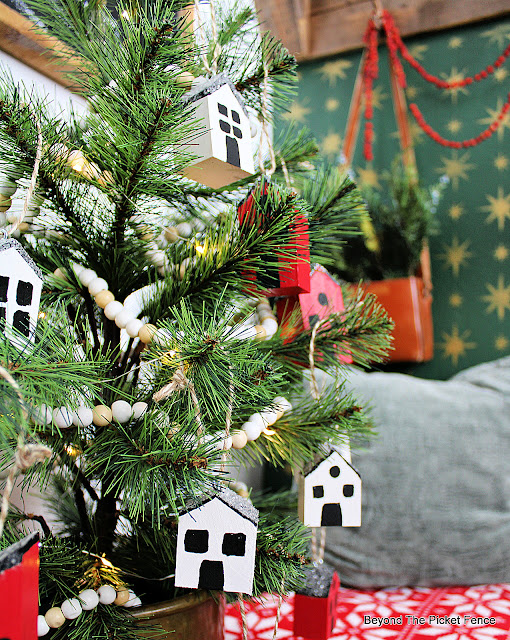
I chose to paint the houses white and red, using craft acrylic paint. Green won't show up great on a green tree, but a light sage green would or dark green on a flocked Christmas tree. Mustard yellow, blue, tan would also look great--whatever colors you decorate with. Remember to paint the bottom of the house too as it will show while hanging on a tree.
Sweet Little DIY House Ornaments
I painted the roofs black and added rustic windows and doors with black paint too. You don't have to be too detailed. I do paint windows on the back of the houses as that may show. 
Sweet Little DIY House Ornaments
When the paint was dry, I painted on white glue on the roof and added glitter. I tried some fake snow, but it was too big and chunky for these little houses. I screwed in an eye screw eyelet and added a twisted jute string as a hanger. 
Sweet Little DIY House Ornaments
These are cute hanging as the only ornament all over a small, tabletop tree. They would look fantastic hanging on a garland draped across a mantle. They make a thoughtful gift for a newly married couple or someone spending their first Christmas in a new home. Make a little tag with the homes address for a keepsake ornament. They are a quick and easy project, perfect to work on while watching your favorite holiday movie.

Tuesday, November 8, 2022

Sweet and Simple Candle Holder

If you read yesterday's post, you know that I accidentally bought some candle cups that ended up being much smaller than I thought that they were. Rather than returning them, I came up with a way (or two) to use the small candle cups. Today's project uses five more of the candle cups and this lovely, vintage, made in England, Johnson Brother's China teacup of the Dunster Castle and Penthouse 1792 (that's not when the cup was made). It is actually a mush cup, which makes it a little larger than a teacup.
Sweet and Simple Candle Holder
I picked this up at a thrift store for one dollar. It had a chip, but I liked it and knew I could find a us for it. It has just been sitting in a tray on my counter. When I found the menorah candles to use with the small candle cups, I knew putting some in this teacup would make a sweet and simple candle holder.
Sweet and Simple Candle Holder
I wanted the candles to stand at slightly different heights. In order to achieve that I cut a piece of floral foam to fit into the bottom of the cup.
Sweet and Simple Candle Holder
I hot glued this into the bottom of the cup. Hot glue is the perfect glue for this project because it holds well, but will be removeable if I want to do something different with the teacup in the future. I then made holes at different heights in the foam block using the round handle of a small paintbrush. I put the candle cups in the holes and then added the candles, which I hot glued in to make sure they were secure.
Sweet and Simple Candle Holder
I added some fake snow to it, three strands of jute to the handle, and an evergreen sprig.
Sweet and Simple Candle Holder
This is sweet sitting on a shelf (that is if the shelf is tall enough to safely burn the candles). It would look lovely on a tired tray or on a tray with other items for a centerpiece. A collection of different teacups, all with candles in them, lined up on a dining table with a pine garland would make a beautiful table display. 
Sweet and Simple Candle Holder
Use what you have, make things work, and create something simple that adds a touch of vintage to your home.

Monday, November 7, 2022

Make It Monday Simple Modern Candlesticks

Make It Monday Simple Modern Candlesticks
Happy Monday! It is a cold and snowy day here in Montana--the perfect day to work in the shop with a lovely, cozy fire burning nearby in the wood stove. Today's project was born from an accidental Amazon order. I ordered candle cups that I wanted to add to some green glass votives I bought. 
candle cups

(This post contains affiliate links which means if you buy something from the link provided, I may receive a small compensation.)

BUT, I either looked at the size wrong or wasn't thinking and ended up with teeny-tiny candle cups (HERE). I thought about returning them, I thought about painting them black and making them into snowmen hats, but then I thought of a way I could use them to make some simple, modern candlesticks using a few supplies.
Make It Monday Simple Modern Candlesticks
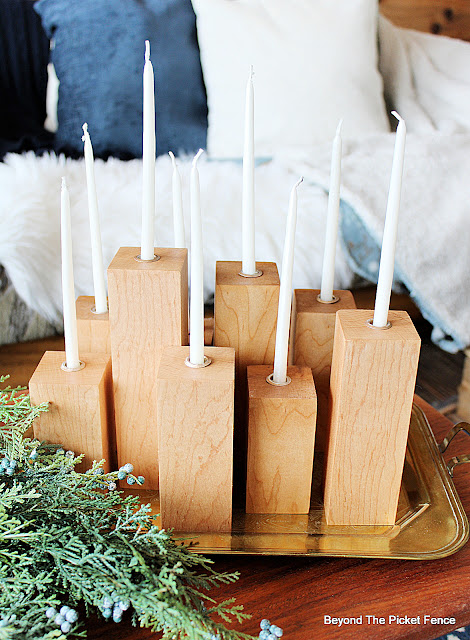
I realized a could find Menorah candles to fit in the small candle cups. I got these at Target--there are plenty you can find online too. Once I had the candles, a scrap piece of 3"x3" white maple and about an hour of time and I created simple, modern candlesticks perfect for the holidays or year round.
Make It Monday Simple Modern Candlesticks
Keep reading to see how I made these PLUS, if the organic modern look isn't your style, I have some ideas to create candlesticks that fit your home decor.

Thursday, November 3, 2022

Thrifty Thursday Flipping Thrift Store Furniture, Literally

Thrifty Thursday Flipping Thrift Store Furniture, Literally
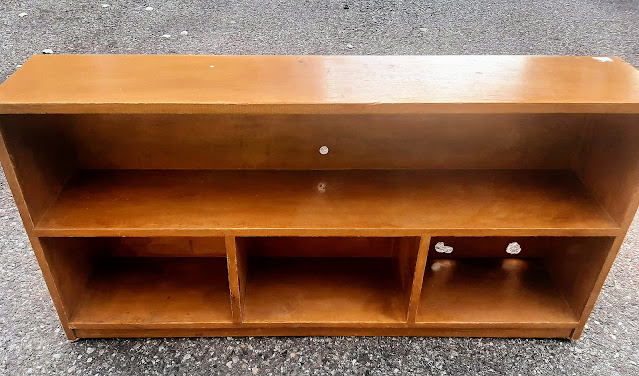
I have been working on the cozy reading nook in my main bedroom and am excited to share a little more progress that I have made in the space. I shared the FREE chair that I fixed up for the nook HERE. I knew I need a bookshelf in the space if I was going to call it a reading nook. I decided I wanted a floating shelf that wasn't too deep. I knew I could make one, but kept my eyes open for one at a thrift store. It didn't take long until I found the perfect piece.
Thrifty Thursday Flipping Thrift Store Furniture, Literally
I thought I might cut off the bottom edge or lip so that it didn't look like I just hung a regular standing bookshelf on the wall. When I was taking it out of my car, I realized I could FLIP it upside down, add a wood top, and use it that way to float on the wall in my reading area.
Thrifty Thursday Flipping Thrift Store Furniture, Literally
Keep reading to see what I did and to see all how I styled these shelves with a plethora of thrift store finds and goodies.

This post contains affiliate links. What that means is IF you buy something from a link provided, I may receive a small compensation at NO EXTRA COST to you.