Hand-Lettering Signs
I often get asked about and comments on my signs and how I hand letter them. And I have posted on it before, but after getting questions on the reindeer sign in my Christmas home tour, I decided it was time for another post on it.
I am by no means an expert and there are a lot of folks out there hand-lettering much more nicely than I do. But, I do enjoy it. I like creating something that looks like it was handmade and not mass-produced. Signs are a dime a dozen nowadays, so I like the idea that something is crafted by hand, individually. And I do use stencils some times, but hand-lettering is so much more rewarding for me.
So, I like to practice hand-lettering in sketchbooks.
It is much easier to letter with a pencil, but the sketchbook is a great way to practice and something to keep your fingers busy while watching a favorite TV show (THIS IS US, do you watch it?).
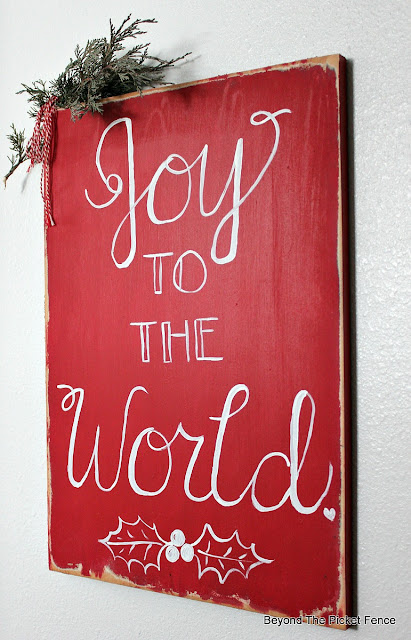
My signs usually start as a "sketch". Painting on a smooth surface is easier than a rough, barnwood piece. The reindeer sign was a hollow-core door in it's past life. We cut up to make two signs that look like nice canvases. This new Joy to the World sign was a shelf board. I painted it with Fusion Mineral Paint in Fort York Red.
I use a yardstick and mark off some lines to keep the writing straight. I always use chalk, pressing lightly. I use colored chalk on signs with a white background.
I then letter my sign with the chalk, This is where the practice comes. There are all kinds of tutorial videos on You Tube, and they do help!! There are days I erase the chalk several times before I get the spacing correct or the look I like.
I most often use this paintbrush.
You want to use a paint that isn't too thick, goes on smoothly, but covers well enough that you don't have to go over the letters a second time. Fusion Mineral Paint is perfect for this!!
I try to paint with the strokes going in a downward motion, which is a little hard to get used to at first. But with a paint brush it is easier. This brush is nice because when your press on it the bristles flatten out and give you a nice, thicker line.
I keep a wet rag nearby and if I mess up, and oh I often do, I try and wipe the paint away quickly. Some times I have to sand a bit and repaint. Practice, it does get easier and more natural.
When the paint is dry, use a wet rag to get rid of the chalk lines. You may need to rinse the rag and wipe the chalk away a couple times.
I made this new sign for my mudroom. I decided it was looking very unfestive and it is the first room we walk into most of the time when we arrive home.
The dog had to check it out--she approved.
So, to recap--1) embrace hand-lettering and its imperfections, 2) practice, practice, practice, 3) chalk is the easiest way to make a rough draft of your sign, and 4)use a good paintbrush and a nice, smooth paint for your lettering.


Love it, & red isn't even my favorite color but it's just so darn festive. Thanks for the tip about practicing in a notepad. I do love letter writing so I can imagine signs would be a lot of fun to try.
ReplyDelete