Y'all, why do we wait to improve things until we are doing it for someone else? We have done this with homes, cars, and now our 29 ft. travel trailer, aka camper.
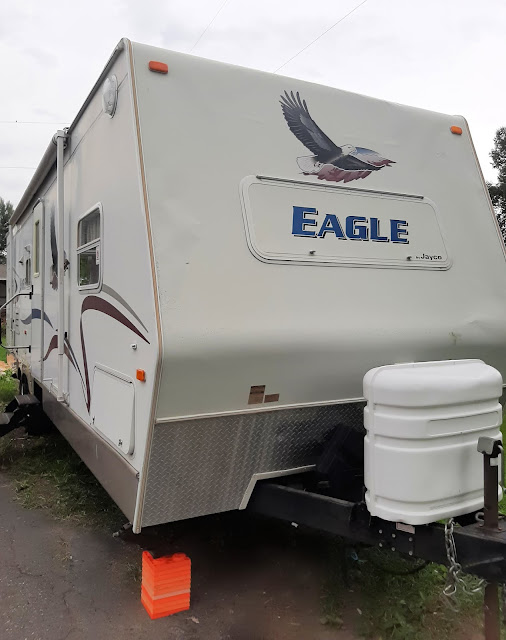
We bought this 2005 Jayco Eagle camper in 2012 and enjoyed many fantastic family trips in it. But, the youngest birdie is leaing the nest so it is time to sell it. First, though, it needed some improvements. I am going to try and share the details of the makeover, but we are by no means experts. This took a lot of sweat equity and I wanted to quit more than once. While I don't have an exact number, I know we spent less than $750 on the total remodel.
The carpet had a burn hole in it, thanks to my son and his buddy "roasting" marshmallows on forks with lighters while "camping" in front of our house. We just always threw a rug over it. So, for resale new flooring it was. In addition, a little leak happened over the winter that warped the ceiling, so that needed repaired and fixed. Most items were purchased at Lowes and no, i do not have any affiliation or make any money from Lowes--it is just the hardware store we prefer.
(Post conrtains affiliate links. If you click on the links I may receive a small compensation. The opinions are totally my own.)
We started with the leak fix. Using FLEX SEAL liquid (not the spay stuff) we repaired the roof. We also applied it on any other future leak potential spots, aka the seams on the roof. We completely removed the interior ceiling and pulled down the insulation and interior plywood to test the sealant therough multiple heavy rainstorms--all held well and nothing leaked at all. There was no mold at all. We did make sure everything was completely dry and clean before continuing.
We then replaced the plywood on the side that leaked, added new insulation, and finally sheets of weathered pine wall papered boards from Lowes. This was a HUGE job, having to cut out for vents, light wires, AC ducts, etc. We used a nail gun to attach the ceiling to the cross beams or trusses. Next came white quarter round for the edges and light wood 1" strips for the seams. All these items were purchased from Lowes.
Next came paint. I removed the lovely, grape leaf border that turned out to be like a big piece of tape. I primed the walls using Zinsser primer. I then painted them using regular, indoor latex paint in an eggshell finish. I only painted the main living area. The color is called Sand Dollar.
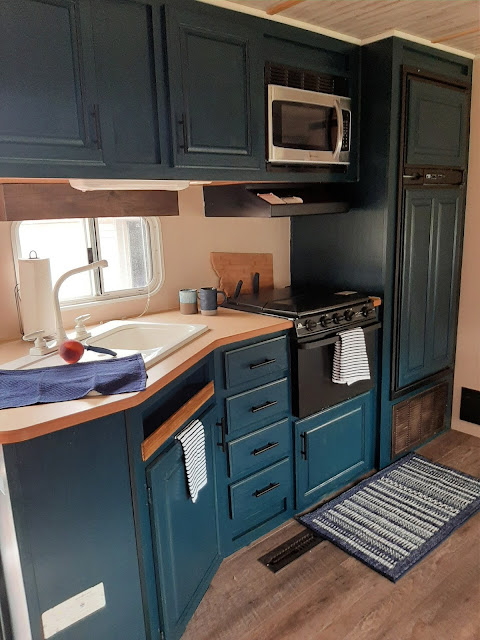
I chose a navy blue for the cabinets and woodwork. I used a Valspar cabinet paint because I didn't want to mess with having to apply wax or a clear coat and i didn't want to wait for FUSION MINERAL PAINT to arrive in the mail. While I love the results with the Valspar, I will only use Fusion Mineral Paint in the future. It covers so much better and does not require a top coat or wax. i used it two (or is three now?) years ago on my own kitchen cupboards and it has held up great. I replaced the cabinet hardware throughout the camper with THESE. New hardware always helps, even on the bedroom cabinets that we did not paint.
We removed the carpet and vinyl flooring, using a carpet knife to cut the flooring away from the edges. We left the vinyl in the small bathroom and the carpet in the bedroom areas. I removed all the staples using pliers and a straight screw driver.
The flooring was replaced with a wood look, peel and stick vinyl flooring from Lowes. After purchasing it and bringing it home, we realized it called for a wood sealer to be applied to the subflooring first. This did provide a nice, sticky surface. Installing the flooring went fairly quickly and smoothly. We cut it with a carpet knife--it took a hit of time to cut around floor vents, etc. We started installing the flooring in the middle of the floor on the 12 foot slide. We did put a 1" board (the same ones used on the ceiling seams) under the vinyl flooring lip on the slide. Small finish nails secured the one strip of vinyl flooring on the slide.
The slide moves in and out perfectly and the flooring is secure along that edge.
I took out the built in TV shelf that had more storage than we ever used
and built a shorter shelf out of lighterweight pallet wood. I built this in sections and assembeled it in the camper. We never watched TV in the camper, but someone could add one to the wall (where I put a US map sign I made) or place one on the shelf and store it while traveling.
Look at these old valances!! They scream 1995 even though the camper is a 2005 model.
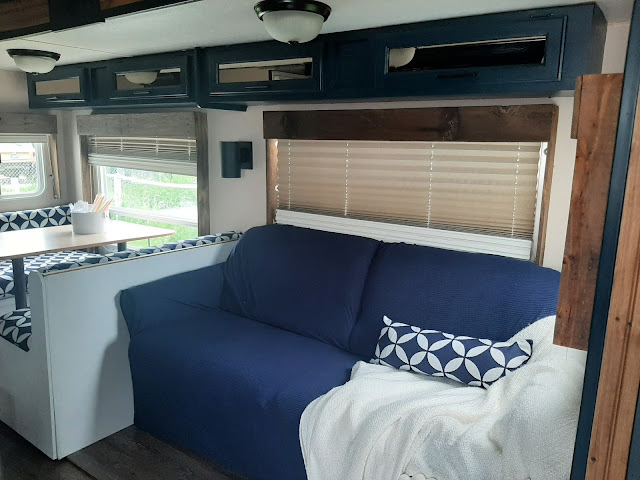
I replaced them with pallet wood valances in the main living area. A couch cover and a new to me, Goodwill blanket and a pillow I sewed updated the couch.
I painted the dinette seating white, using the primer first. I recovered the cushions with an upholstery fabric from Joann's. Rather than completely recovering them, I used boards on the bottom of them to staple the fabric to--much easier than sewing. I spray painted the shiny chrome table poles with antique oil rubbed bronze paint.
We added pine beadboard on the slide edges that were fabric.
Oil rubbed bronze light fixtures purchased at Goodwill replaced shiny brass lights. You can use regular light fixtures AS LONG AS YOU use 12 VOLT light bulbs (you can get HERE). I knew the lights did not have on/off switches like the regular camper lights did, but I thought you would be able to turn them off with the main light switch. But...nope. So we added toggle switches so they can be turned on and off. My husband knows wiring and electricity. PLEASE consult a professional if you do not.
The main bedroom got new bedding that I had previously purchased for the camper. I made curtains from a drop cloth and pillows from a $2 thrift store curtain panel.
The bunk room got new curtains, pillows and sheets, and a new fabric covered railing.
I put up a shower curtain and rod to cover the brassy gold on the shower door, but left the shower door up for the new owners.
The bathroom area is the same, other than new hardware.
I am thrilled with the after and we the camper has a new owner. I am not sure i will ever remodel a camper again. But, if I do I will remember that it will take twice as long as I planned, will be harder than I think it should be, and will be totally worth the effort!


You did a great job. I am sure new owners will enjoy it.
ReplyDeleteThank you!!
Delete