Reclaimed Wood Island
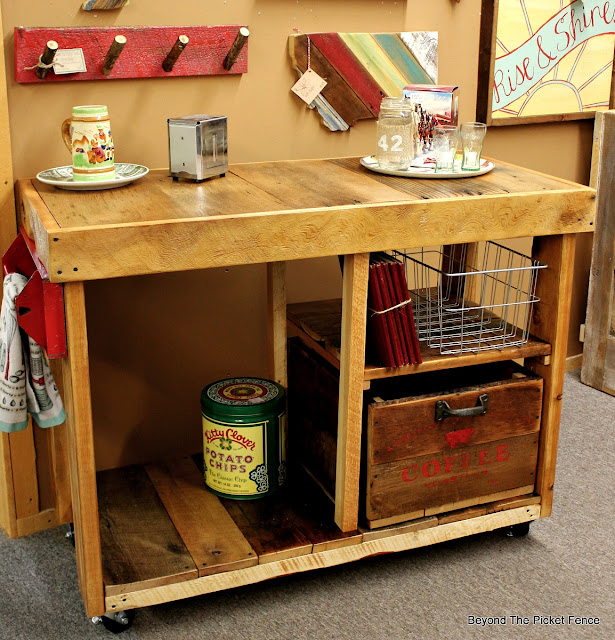
I haven't made an island in a while so yesterday I decided it was time and I created this one from reclaimed wood. (Sorry, pictures were taken in my booth, no natural light.)
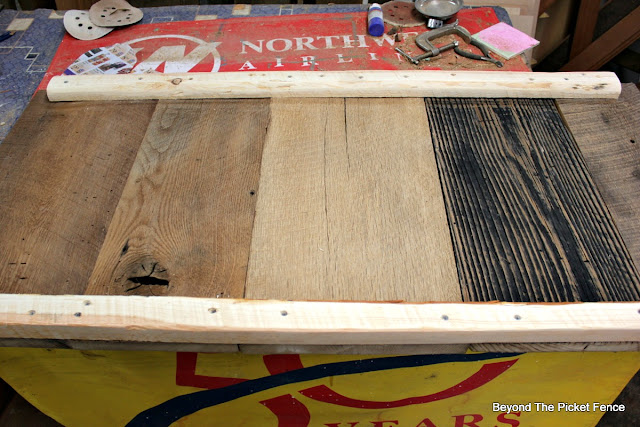
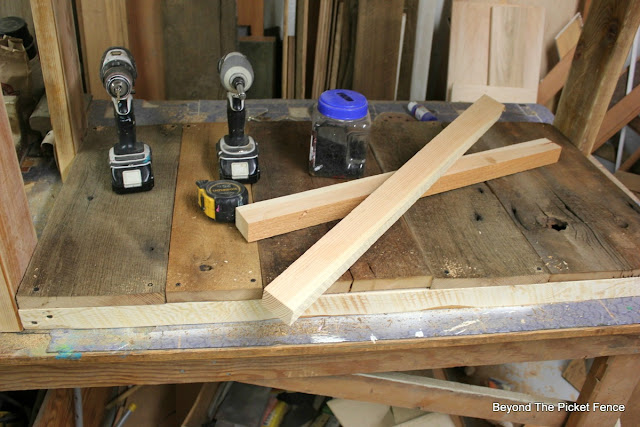
The first thing I did is I decided I wanted the island top to be 2'x4' so I cut pieces 22" for the top (the other 2" comes from the apron sides). I secured these together with 2"x 2" boards .
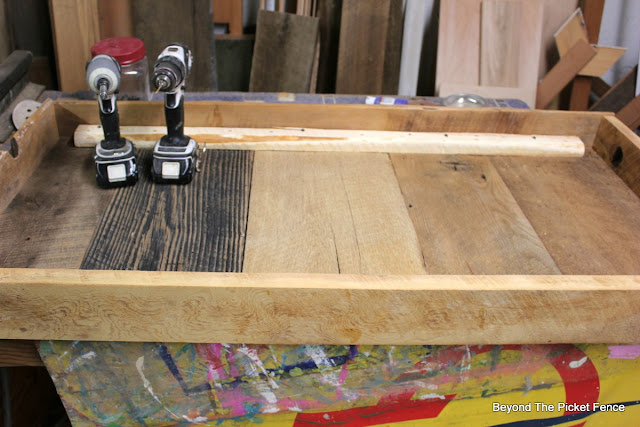
I then measured again (measure twice, cut once) and cut the pieces for the apron and attached it by screwing through the 2"x 2".
Next I added 2"x 6" legs cut to 32" (I forgot the picture). I then made a bottom shelf bracket from 2"x 2". I made sure this was very square as it is an important addition to help square up and secure the legs.
I cut pieces for the bottom shelf (this wood is reclaimed barnwood, mostly chestnut) and attached it to the bottom brace, except the middle shelf board.
I attached two 2"x 2" pieces to the middle board, screwing up from underneath the shelf board. I almost made a mistake here and put the 2'x 2" boards on the edge of the shelf board, but they need to be an inch in because this upright 2"x 2" board will be attached to the inside of the apron. THEN attach the middle shelf board to the bottom shelf bracket.
Secure the vertical 2"x 2" boards to the apron underneath. Next, I cut two 1"x 1" boards for a shelf bracket. I screwed one to the 2"x 2" boards and on to the legs (14" up from the bottom shelf). I then cut boards and added the middle shelf, using the nail gun to secure it to the shelf braces.
I sanded, and sanded, and sanded. (I am getting much better at wearing a mask while sanding!)
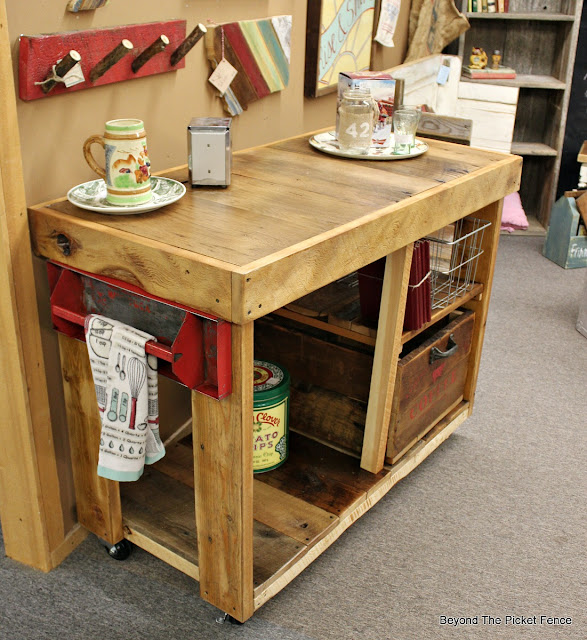
I added a tool box tray for a towel holder.
I love the made in the USA on the tool tray.
I also love some of the reclaimed wood characteristics like this notch cut out on one apron piece. It was no doubt hand-notched.
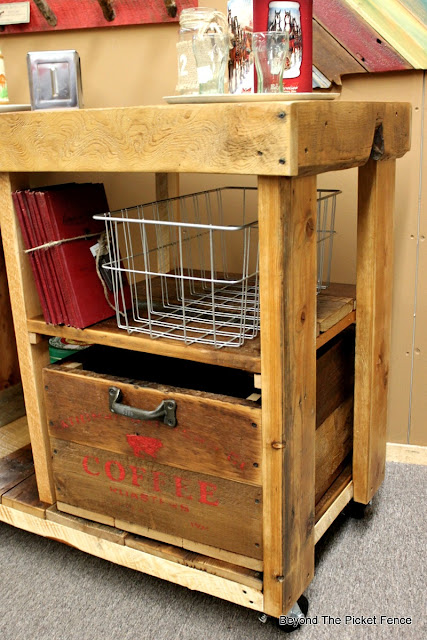
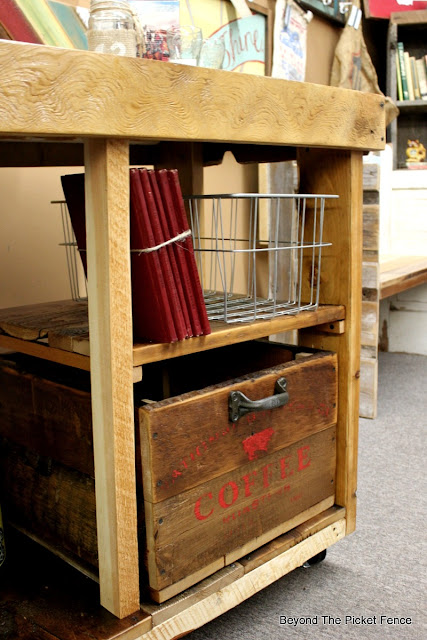
I made a crate to put on the bottom shelf. I didn't show you the how to's for that (BUT, my book HERE shows you how!)
I stenciled it with the COFFEE stencil from Old Sign Stencils. I used red to tie in the tool tray, but sanded it quite a bit so it looked old and worn.
The metal freezer basket goes with the island too. I also added a bottle opener to one of the legs after I took these photos.
I am currently loving keeping the wood its natural color, not staining it, and only adding a clear coat to bring out the natural beauty. Oh, and I added 4 locking casters to make this a great and easy piece for any home.
I don't think I have shown you this cute rooster so thought I would share it too.








This is really wonderful, Becky! Such a special piece...I love the storage...and the tool box towel rack is so fun!
ReplyDeleteThanks Linda, I had a lot of fun making it!
DeleteLove the storage and the colour of the wood. What a great and very handy piece of furniture.
ReplyDeleteJoy
Thank you Joy, it is a piece that could be used in lots of places!
DeleteLove it! Very useful & oh so pleasing to look at. I scored two wooden shutters for free today from Craigslist. They're really tall ones so I'm thinking 2 shutter Islands. The last one I made to sell is now in my kitchen. I couldn't part with it. That's what I get for painting it butter yellow with oak stained top, middle shelf & bottom storage bin. Besides, I have minimal counter space so I really needed the extra work surface.
ReplyDeleteThanks Deb, the shutter islands are fun to make. I have had a tough time finding good shutters to make another. Yes, always safer to make things in colors that do NOT go in our own homes ;).
Deleteυπεροχοοο!!!
ReplyDeleteLove this so much! I got a Kreg Jig for Christmas and I'm super excited to try a new project. This could be it! thank you !
ReplyDeleteA kreg jig will be great for the project. I have one, but often don't use it because I am not great with it yet.
DeleteJust a tip for everyone. If you are looking for free reclaimed wood, just call up your local fence contractors and ask if they are doing any fence removals and ask if you can have some of the fence boards, braces or posts. Bring a hammer, cats claw, screw drivers, cordless reciprocating saw (optional) and gloves.
ReplyDelete